So im rebuilding a set of magna calipers to go on my CE wagon (CC wagon) its been pretty cheap so far for what will hopefully be an easy 276mm brake upgrade.
Figure if its easy and cheap then there should be lots more people with bigger rotors behind there open sporty wheels.
Also, this is my first ever rebuild, and there is probably things I could have done better/easier etc. This is the way I did it, and from what I can tell it worked pretty good. Feel free to add hints/comment/flame watever.
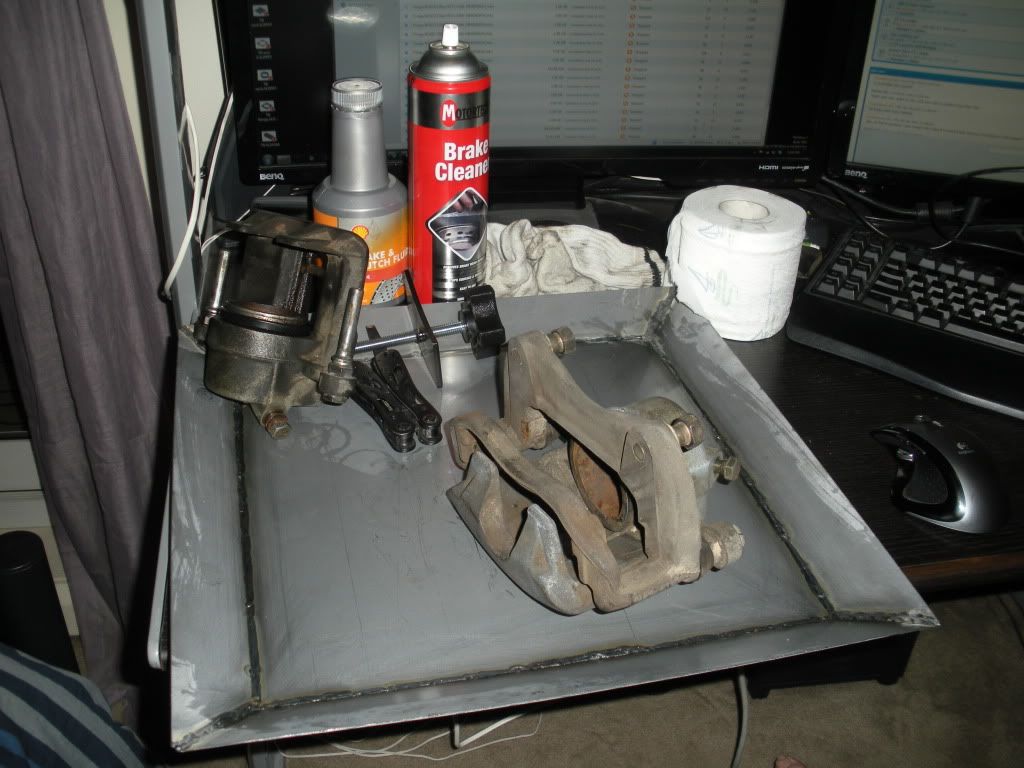
Pic of everything I used, plus your normal spanner set etc, and my small 12V air compressor and battery which sit outside and I could fit them in my photo.
-Caliper
-Caliper Rebuild/Seal Kit
-Brake Cleaner
-Rags/Toilet paper
-Brake spreader
-Brake Fluid
-Pan I made at work, so I can do greasy/oil stuff on my desk without spilling stuff everywhere.
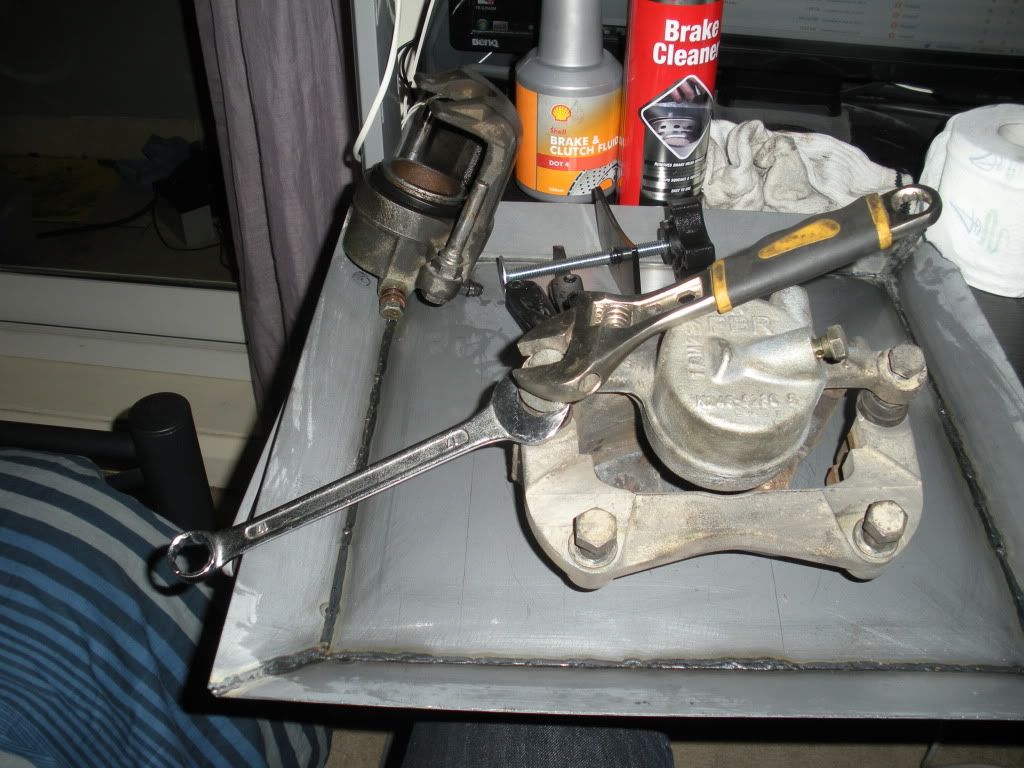
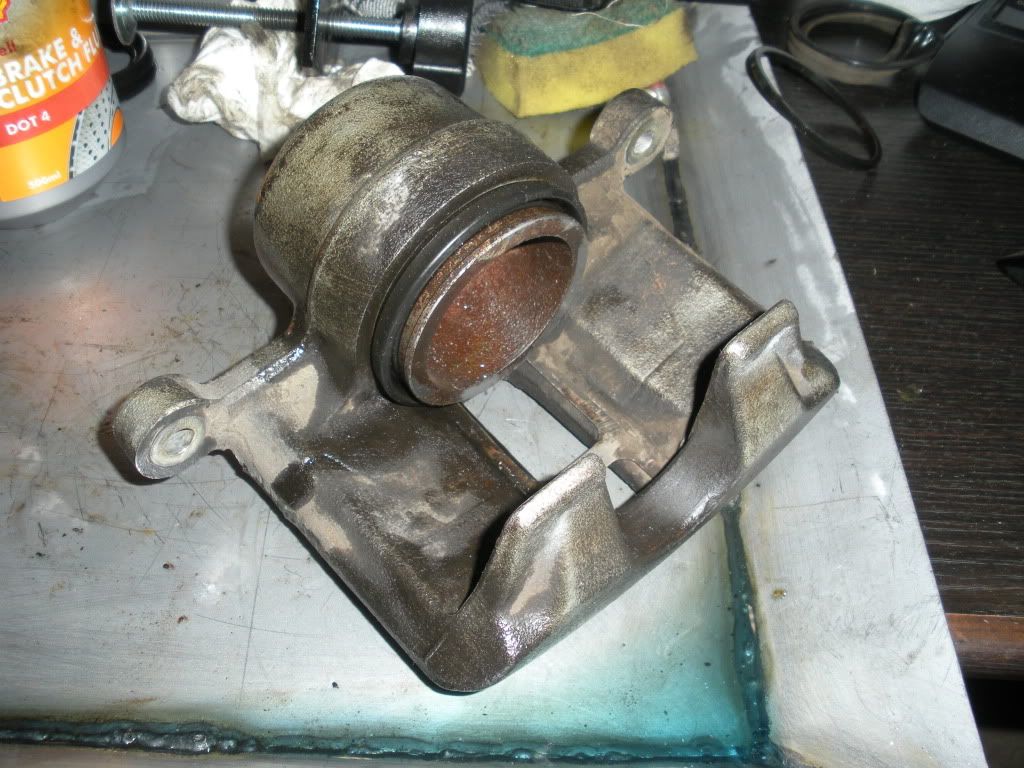
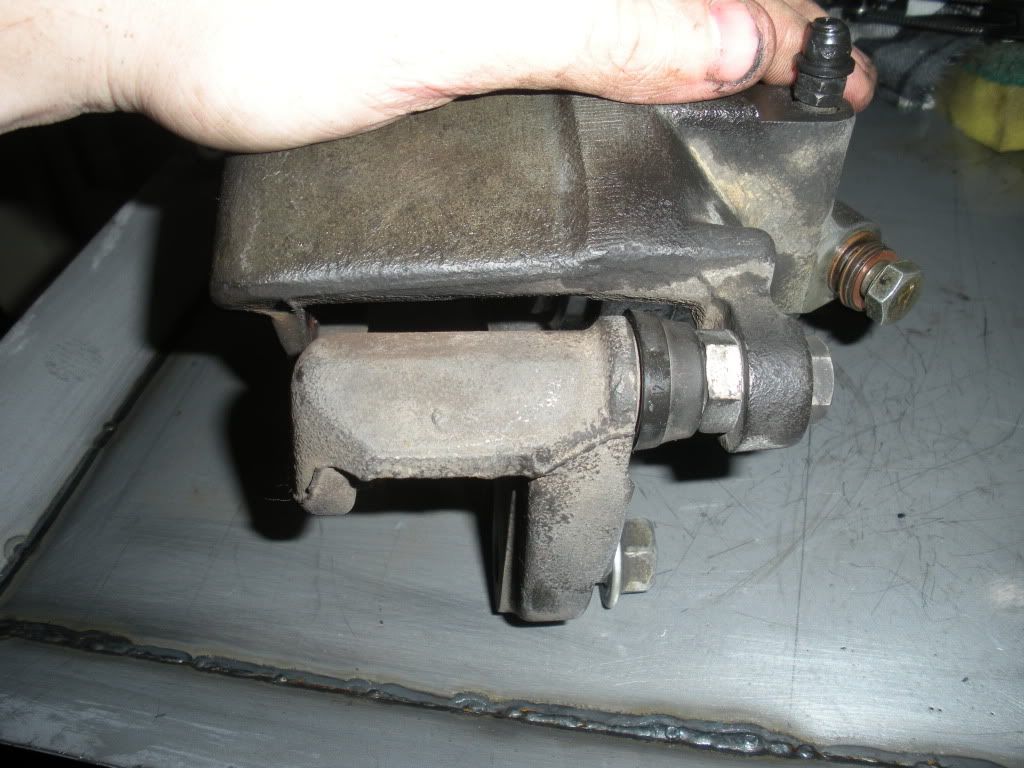
Undo the bolts to separate the 2 pieces of the caliper. (Lancers have only one long bolt that goes through and has the slidy bit, Magna's have a separate slidy bit and a bolt that goes through that, hence the reason for 2 spanners)
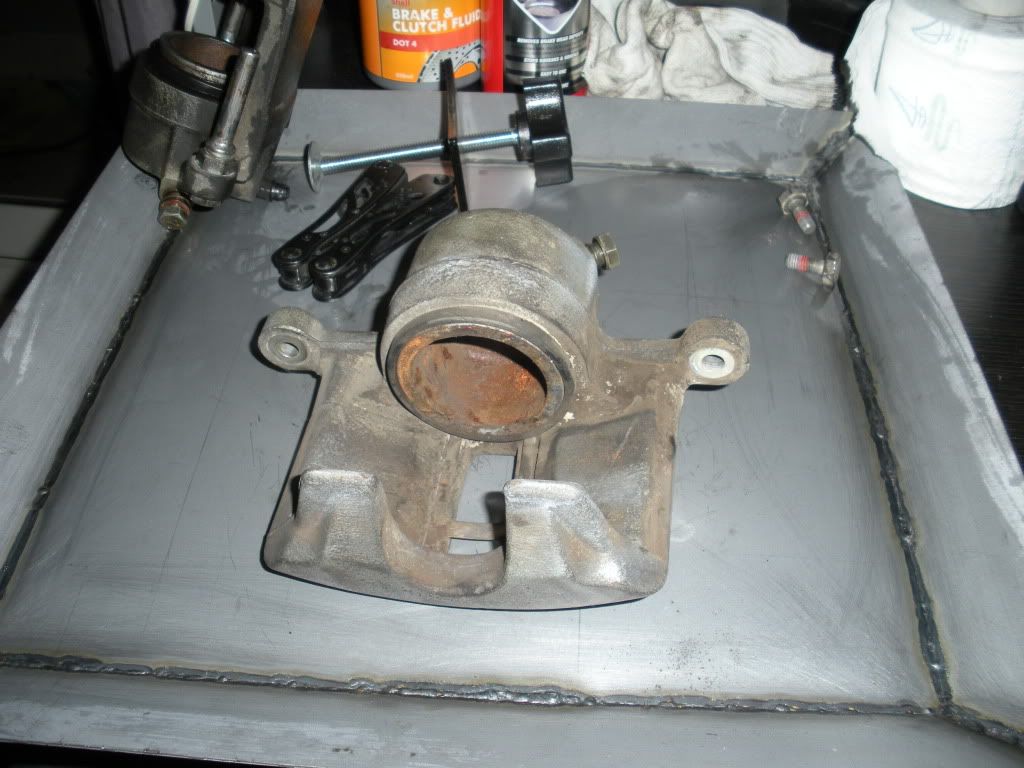
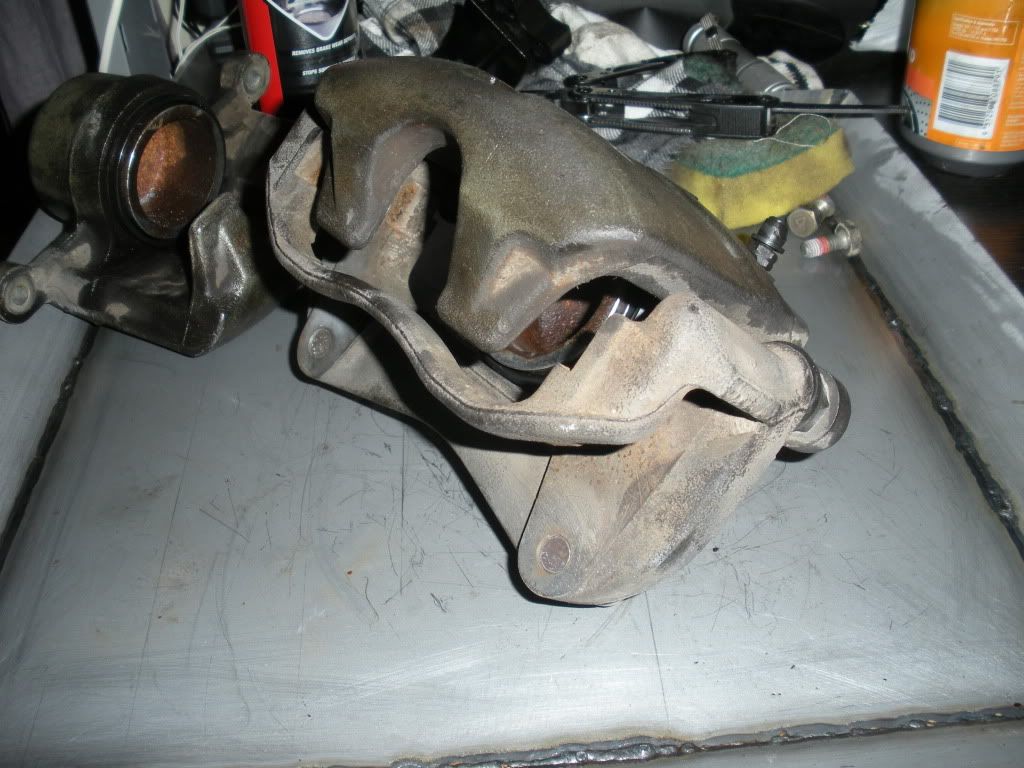
Floating caliper without the fixed piece.
Plumb up your air compressor, I just jammed the rubber hose into the banjo hole as it was close enough, if you have a proper air compressor, you should just be able to use a rubber tipped air gun attachment.
Put something in between the piston and the caliper so when it shoots out it doesn't damage anything, best is a block of softwood like pine etc, I didnt have wood so i just used an old explorer sock, worked well enough, didnt hear any bang when it came out, except for the pop of the air rushing.
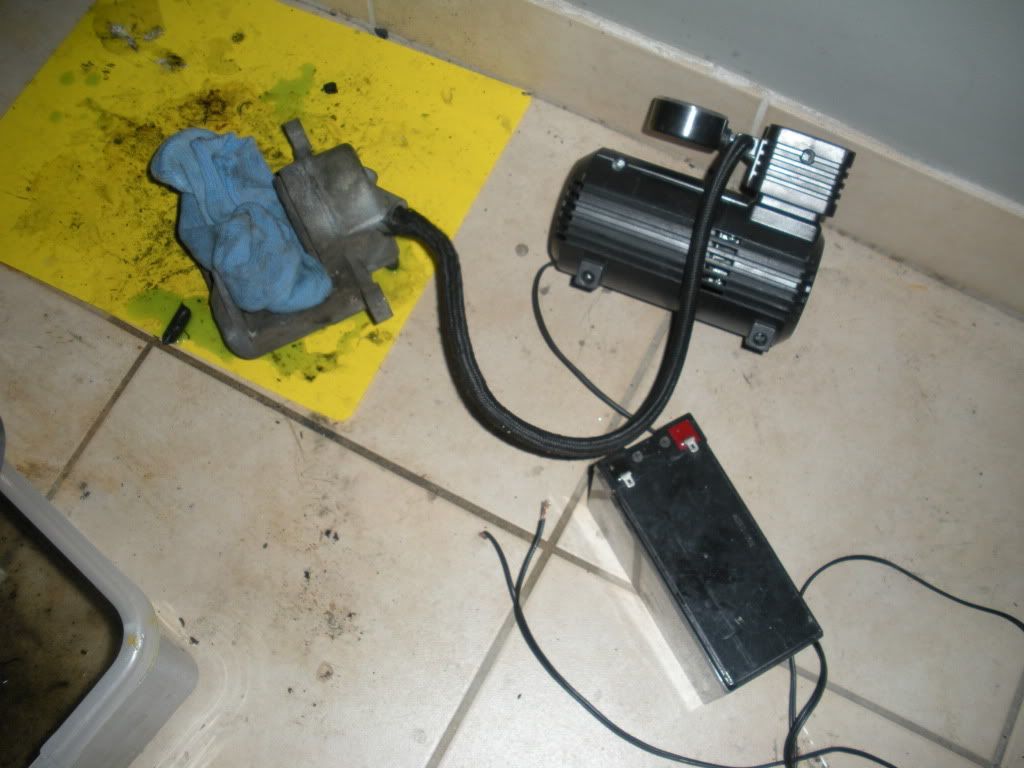
Turn air compressor on, depending on your LPM/Pressure/condition of caliper inner seal etc, it will move slowly then appear to stop, then a bit more and it will go pop/bang and shoot out, hopefully to be stopped by your wood block or sock.
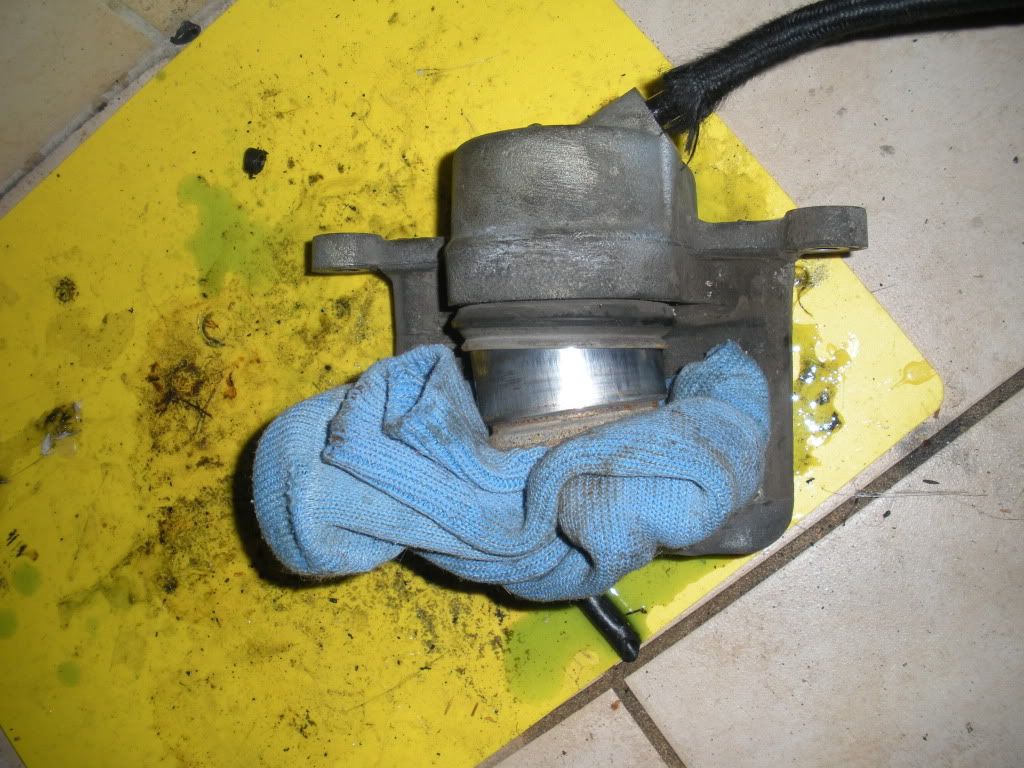
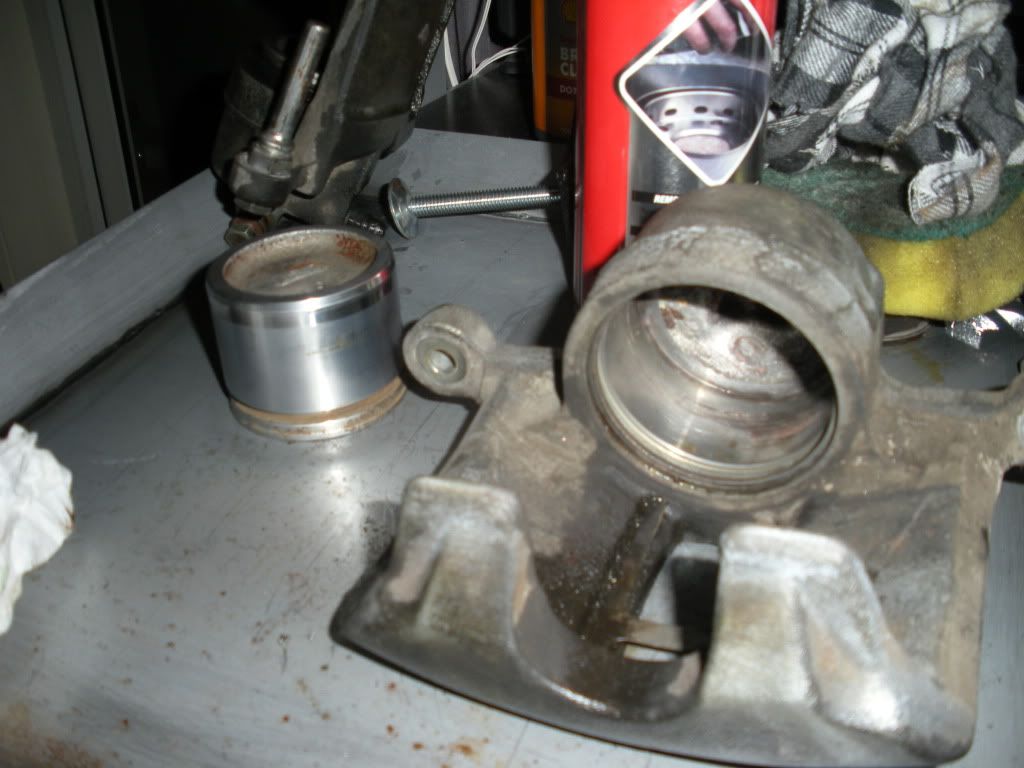
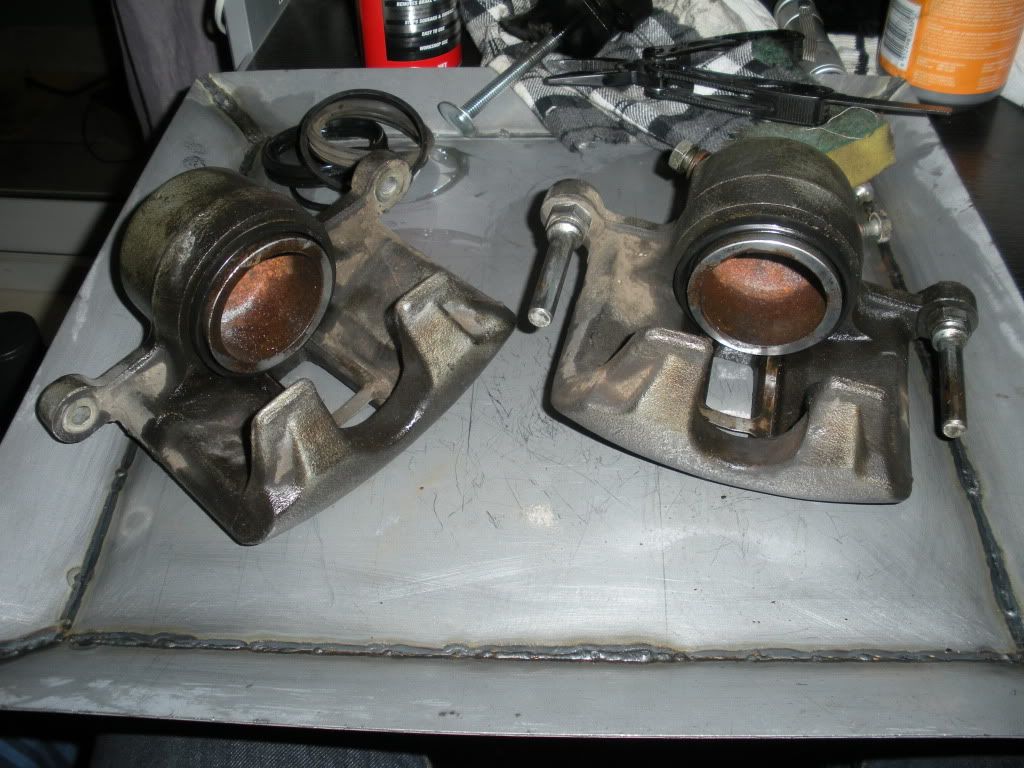
Piston removed, and caliper still with outer dust cover seal, very dirty inside.

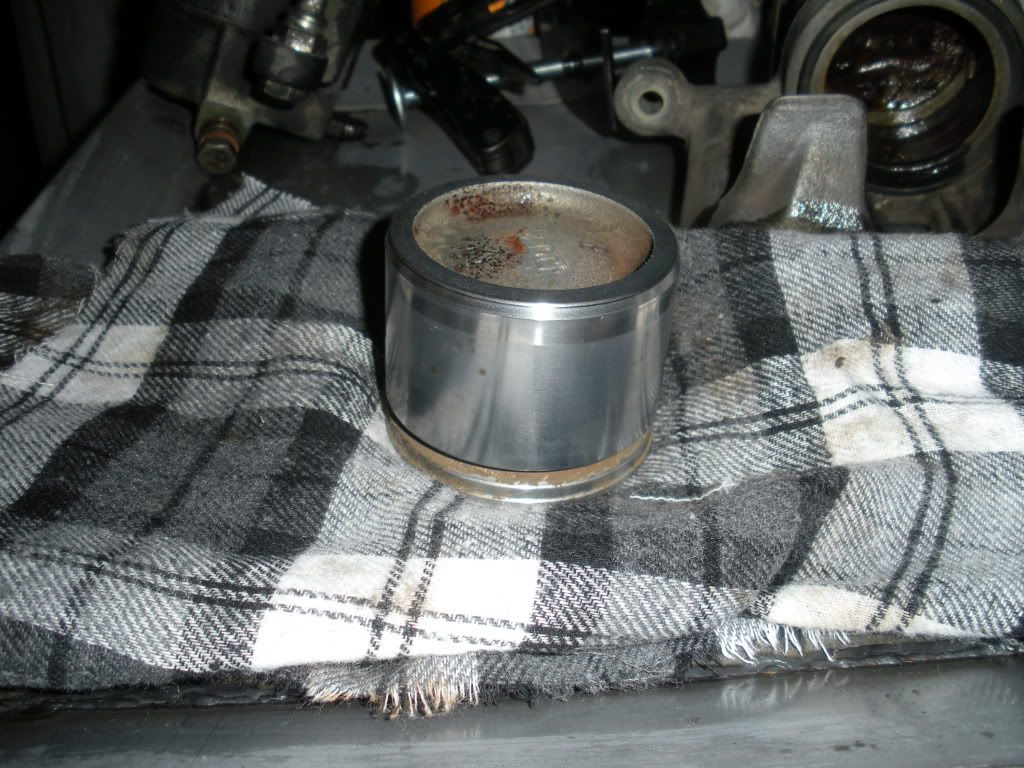
Using your brake cleaner and rags, clean the piston too remove all the rust/dirt/crap being very careful not to scratch it, as that could cause a leak in the seal between the piston and the piston bore.
Nice and clean, a few stains on the steel, but its nice and smooth.
Looking at the caliper now, time to clean the dirty piston bore
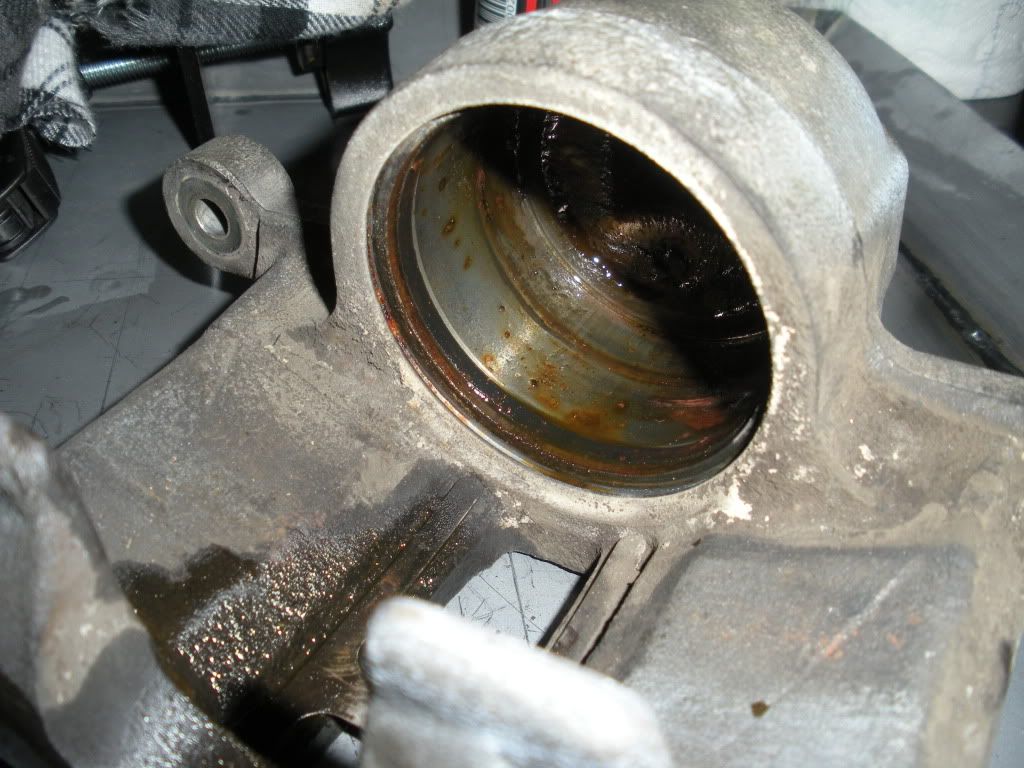
Remove the inner seal with something that wont scratch the bore, BBQ/Kebab skewers work well
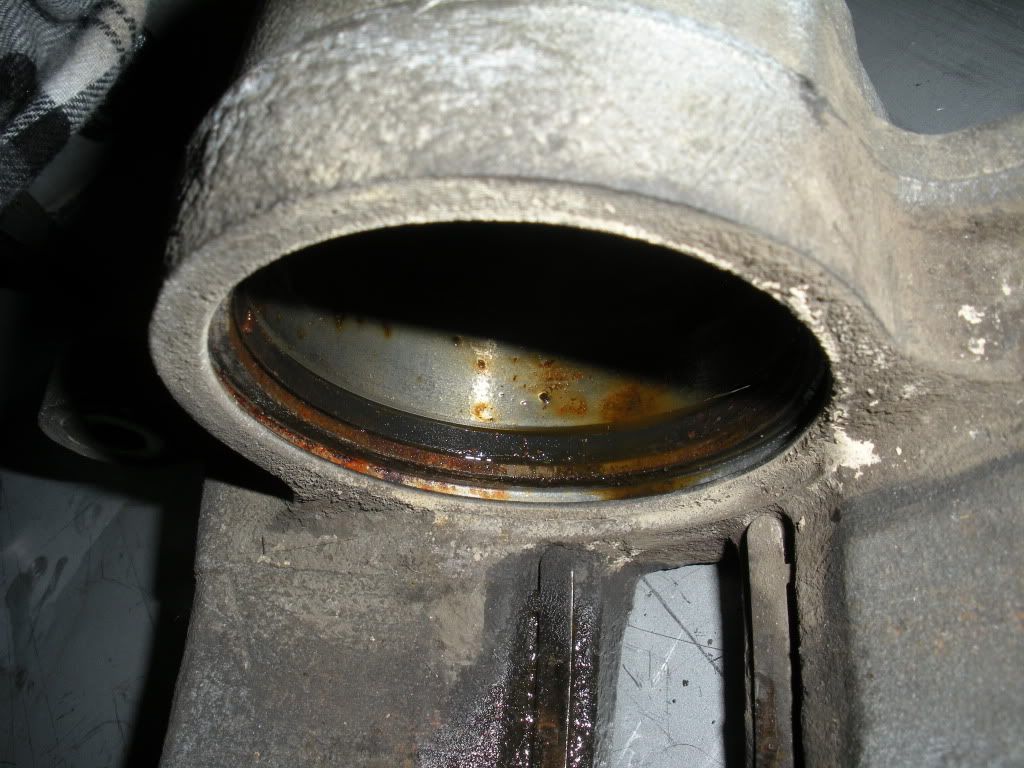
Using the brake cleaner again with your rags, clean the inside of the caliper, including the bleed path and brake line path. Few stains on the piston bore as well, but still nice and smooth.
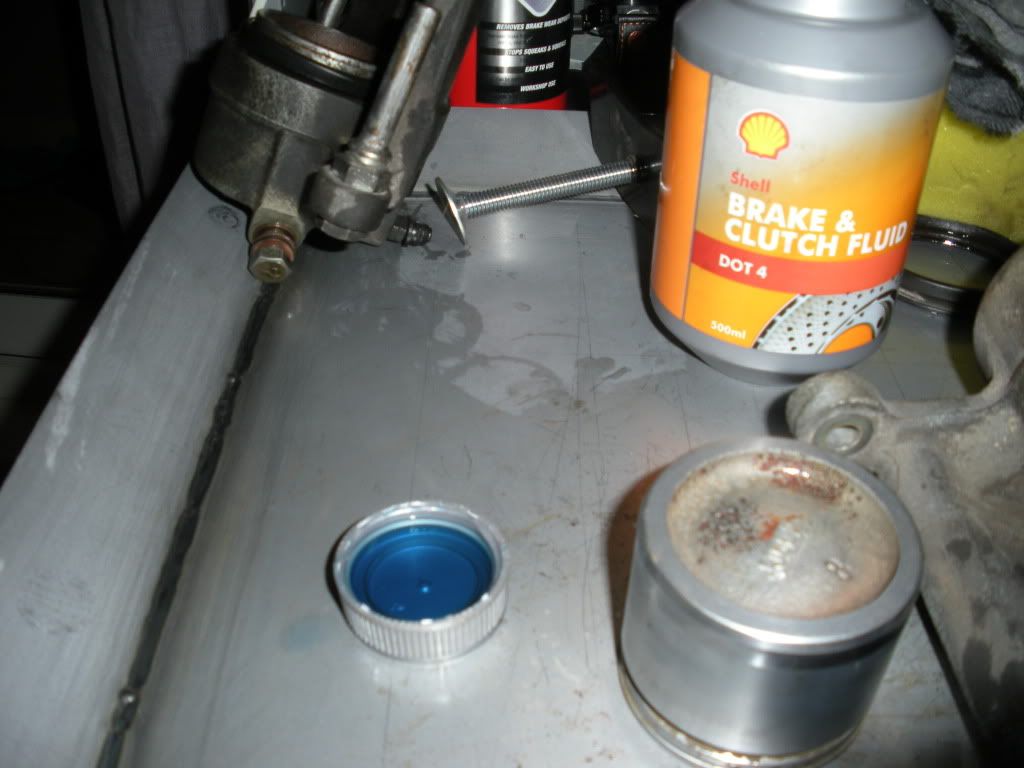
Now to start assembling, pour some brake fluid into the lid, as you will need to lubricate the seals/piston before you put them back in, also make sure you have your rebuild kit with you.
Lubricate the new inner seal ring and insert it into the groove in the caliper that the old one came out of, this is the easy one. (no pics of it in sorry, forgot to take one)
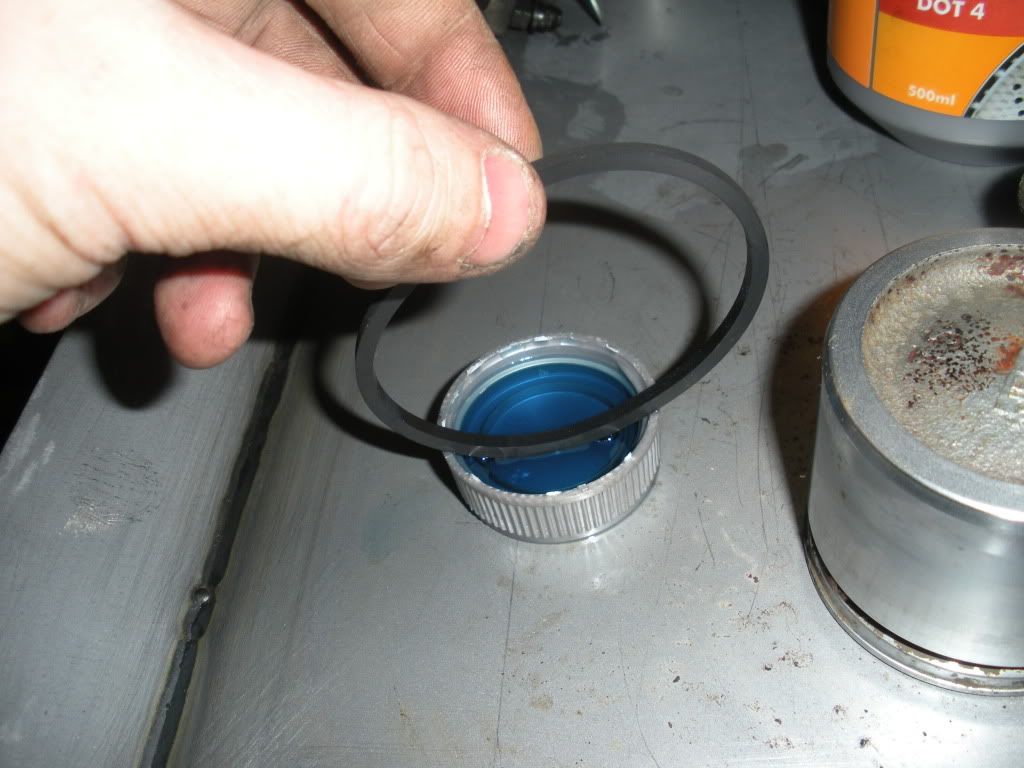
Now for the hard part, atleast on this caliper, some of them have retaining rings, from what i hear those are easier. Anyways for this one, put the new dust cover seal on the piston same as it came off (after lubricating it with brake fluid of course) Then slide the cover to the end of the piston that goes into the caliper first, and slide it over the edge so its only half on or so.
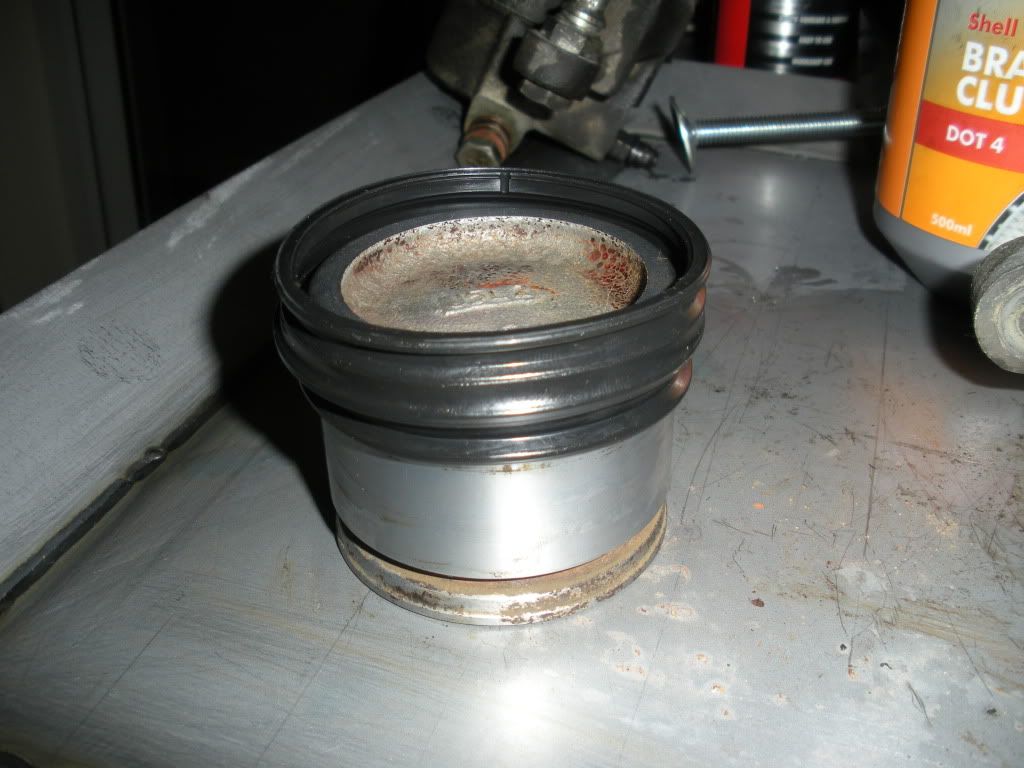
Then hold the piston near the bore without actually putting the piston in, but insert the lip of the seal that has to go in the outside groove. This is quite tricky, I put the bottom in first as you cant get to it with your fingers after you move the piston close. I used the toilet paper to hold the piston at a distance from the caliper so that I could have 2 hands to push the seal in. Once you get the seal in, twist the piston back and forwards a bit to help seat the seal in the groove.

You should now be able to push the piston into the caliper if you have a bit of muscle and lubricated the seals and piston.I
If you forgot, pull the piston out of the cylinder without pulling it out too far that the dust cover comes out again, then pour brake fluid down the hold the brake line goes in and shake the caliper around to put the fluid all around the cylinder. Then push it in.
If you cant push it in past the first seal, then you have pinched it somewhere, have a look, pull the piston out and try again.
If you've pushed it past the first seal but struggle to push it all the way in, you can give it a bit of persuasion with the disc brake spreader (or a clamp), just make sure you push it straight and not to one side.
Done
I put my brakes back on the air compressor and did a few light pumps of air to simulate a fluid pressure behind it to make sure it actuates as normal, then pressed it back in with the spreader to sorta simulate a pad change (if you do this make sure you dont go too far and push the piston out of the caliper again)
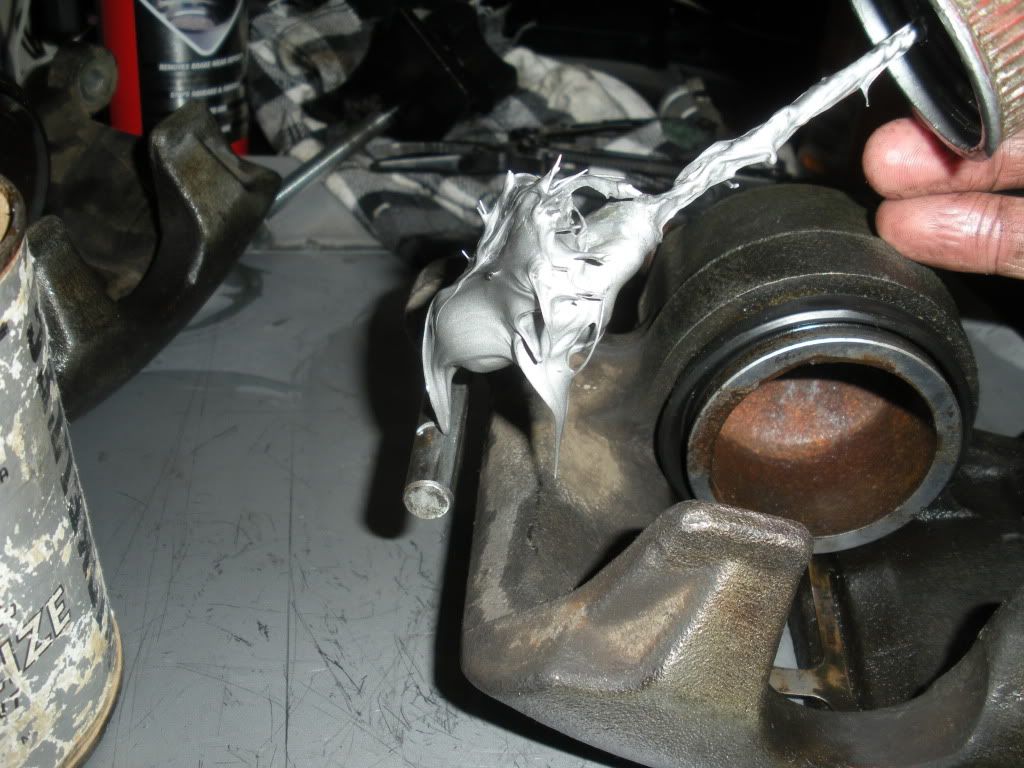
Now give your slidy pins a clean and put them back on the caliper, dab some anti-seize or equivalent on them as they need to be nicely lubricated. I like to use the nickel based anti seize on pretty much anything, works well i have tins of it")
Locate your new dust caps for the slidy pins from your seal kit.
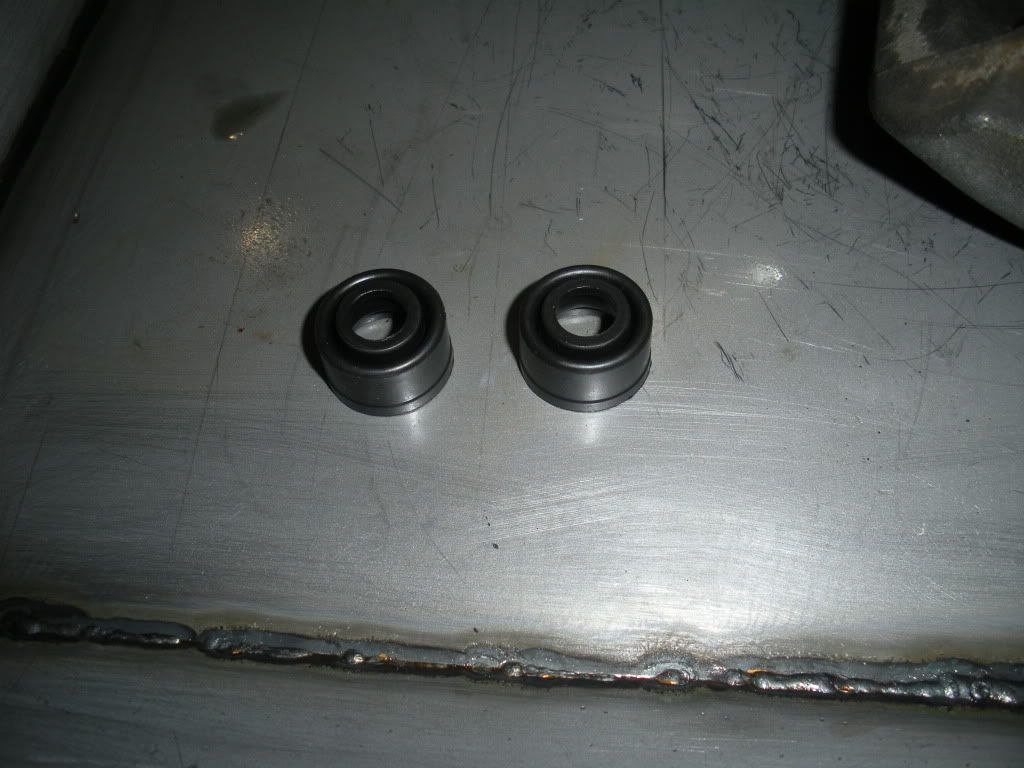
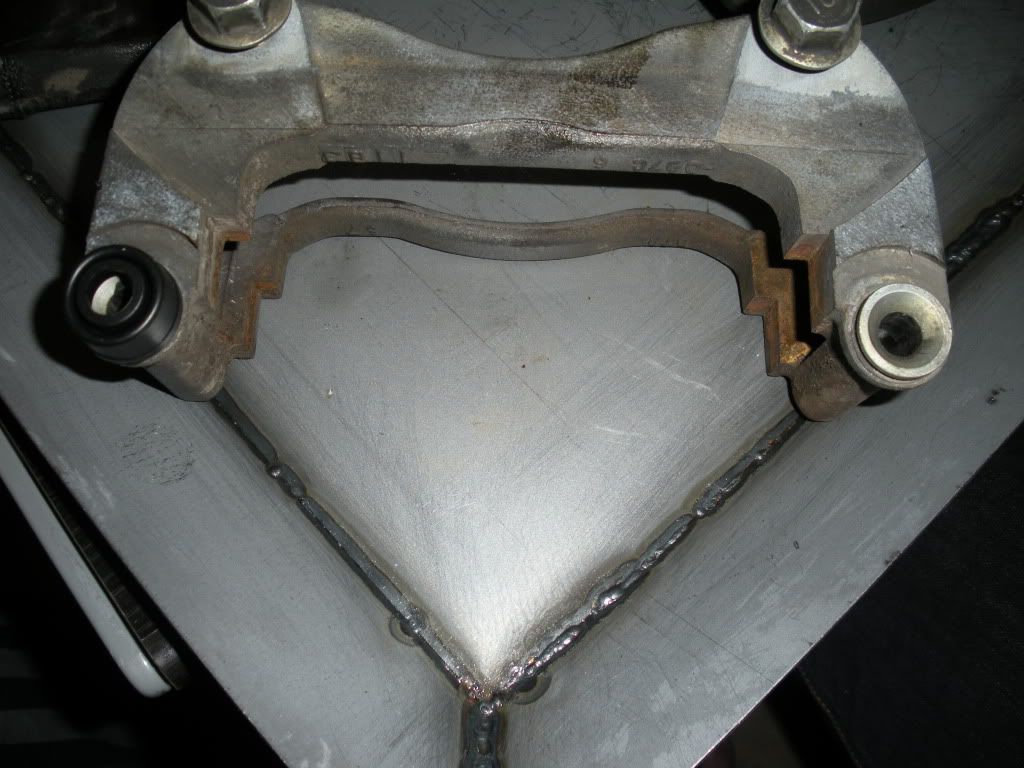
Put them on the fixed caliper piece the same way they came off. (I only put 1 on to show what the lips things look like without a cap, you need to put both on.
Mate the 2 pieces of the caliper together again on the slidy pins same as before you took them off, this time push them together until both the little dust caps until they make a funny popping noise as they slide over the lip and seal up.
(I used the old rubbers from here on as I was doing it for photo purposes only, I was going to paint the caliper the next day so the caps had to come off anyways)
All done! Fit to your car, bleed, test them!, then brake your heart out.
Hope this is useful to someone.
Brendan
Also I did this DIY all in one go, if anything is out of order or doesn't make sense, its probably my editing. Let me know
Figure if its easy and cheap then there should be lots more people with bigger rotors behind there open sporty wheels.
Also, this is my first ever rebuild, and there is probably things I could have done better/easier etc. This is the way I did it, and from what I can tell it worked pretty good. Feel free to add hints/comment/flame watever.
Pic of everything I used, plus your normal spanner set etc, and my small 12V air compressor and battery which sit outside and I could fit them in my photo.
-Caliper
-Caliper Rebuild/Seal Kit
-Brake Cleaner
-Rags/Toilet paper
-Brake spreader
-Brake Fluid
-Pan I made at work, so I can do greasy/oil stuff on my desk without spilling stuff everywhere.
Undo the bolts to separate the 2 pieces of the caliper. (Lancers have only one long bolt that goes through and has the slidy bit, Magna's have a separate slidy bit and a bolt that goes through that, hence the reason for 2 spanners)
Floating caliper without the fixed piece.
Plumb up your air compressor, I just jammed the rubber hose into the banjo hole as it was close enough, if you have a proper air compressor, you should just be able to use a rubber tipped air gun attachment.
Put something in between the piston and the caliper so when it shoots out it doesn't damage anything, best is a block of softwood like pine etc, I didnt have wood so i just used an old explorer sock, worked well enough, didnt hear any bang when it came out, except for the pop of the air rushing.
Turn air compressor on, depending on your LPM/Pressure/condition of caliper inner seal etc, it will move slowly then appear to stop, then a bit more and it will go pop/bang and shoot out, hopefully to be stopped by your wood block or sock.
Piston removed, and caliper still with outer dust cover seal, very dirty inside.
Using your brake cleaner and rags, clean the piston too remove all the rust/dirt/crap being very careful not to scratch it, as that could cause a leak in the seal between the piston and the piston bore.
Nice and clean, a few stains on the steel, but its nice and smooth.
Looking at the caliper now, time to clean the dirty piston bore
Remove the inner seal with something that wont scratch the bore, BBQ/Kebab skewers work well
Using the brake cleaner again with your rags, clean the inside of the caliper, including the bleed path and brake line path. Few stains on the piston bore as well, but still nice and smooth.
Now to start assembling, pour some brake fluid into the lid, as you will need to lubricate the seals/piston before you put them back in, also make sure you have your rebuild kit with you.
Lubricate the new inner seal ring and insert it into the groove in the caliper that the old one came out of, this is the easy one. (no pics of it in sorry, forgot to take one)
Now for the hard part, atleast on this caliper, some of them have retaining rings, from what i hear those are easier. Anyways for this one, put the new dust cover seal on the piston same as it came off (after lubricating it with brake fluid of course) Then slide the cover to the end of the piston that goes into the caliper first, and slide it over the edge so its only half on or so.
Then hold the piston near the bore without actually putting the piston in, but insert the lip of the seal that has to go in the outside groove. This is quite tricky, I put the bottom in first as you cant get to it with your fingers after you move the piston close. I used the toilet paper to hold the piston at a distance from the caliper so that I could have 2 hands to push the seal in. Once you get the seal in, twist the piston back and forwards a bit to help seat the seal in the groove.
You should now be able to push the piston into the caliper if you have a bit of muscle and lubricated the seals and piston.I
If you forgot, pull the piston out of the cylinder without pulling it out too far that the dust cover comes out again, then pour brake fluid down the hold the brake line goes in and shake the caliper around to put the fluid all around the cylinder. Then push it in.
If you cant push it in past the first seal, then you have pinched it somewhere, have a look, pull the piston out and try again.
If you've pushed it past the first seal but struggle to push it all the way in, you can give it a bit of persuasion with the disc brake spreader (or a clamp), just make sure you push it straight and not to one side.
Done
I put my brakes back on the air compressor and did a few light pumps of air to simulate a fluid pressure behind it to make sure it actuates as normal, then pressed it back in with the spreader to sorta simulate a pad change (if you do this make sure you dont go too far and push the piston out of the caliper again)
Now give your slidy pins a clean and put them back on the caliper, dab some anti-seize or equivalent on them as they need to be nicely lubricated. I like to use the nickel based anti seize on pretty much anything, works well i have tins of it
Locate your new dust caps for the slidy pins from your seal kit.
Put them on the fixed caliper piece the same way they came off. (I only put 1 on to show what the lips things look like without a cap, you need to put both on.
Mate the 2 pieces of the caliper together again on the slidy pins same as before you took them off, this time push them together until both the little dust caps until they make a funny popping noise as they slide over the lip and seal up.
(I used the old rubbers from here on as I was doing it for photo purposes only, I was going to paint the caliper the next day so the caps had to come off anyways)
All done! Fit to your car, bleed, test them!, then brake your heart out.
Hope this is useful to someone.
Brendan
Also I did this DIY all in one go, if anything is out of order or doesn't make sense, its probably my editing. Let me know
")
 wish I had a buffing wheel though. All the more to look forward next time though.