okay so very happy with this short shift would recomend it, so figured i would do a diy
this also goes for other short shifts and OEM shifter replacents
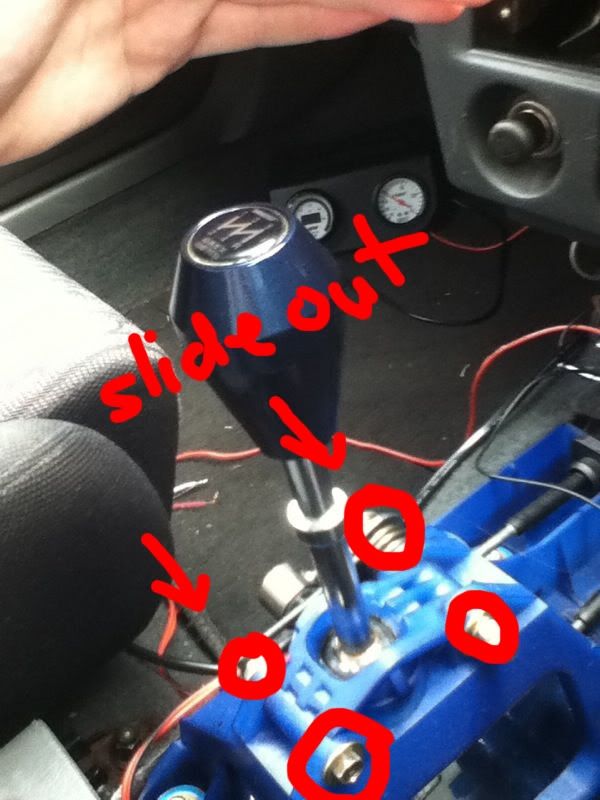
step 1;
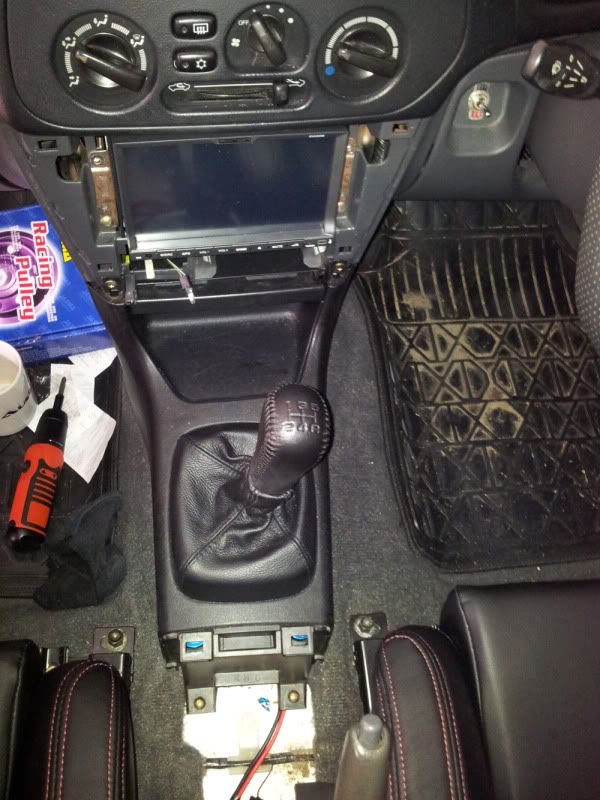
grab a phillips head screw driver, and undo the plastic trim around the shifter (refer to diy trim removal thread here: viewtopic.php?f=41&t=175)
okay now u got the trim off, remove the screws as indecated in fig.1, you will require an allen key (i think 8 or 10mm allen) and a 10/12/14mm socket
TAKE NOTE OF THE SPRINGS AND WASHERS AND HOW THE SPRING GOES UNDER AND OVER THE SIDE STEM OF THE SHIFTER, this is very important it goes back the same way
[fig.1]
step 2;
remove the cap over the main pivot point of the shifter, slide it directly up and off the stem of the shifter.
now undo the bottom connection of the shift line, the bush should pop off, and then remove the shift stem from its cradle
step 3;
if you have the UK short shift kit now is the time to swap out the bushings at the base of the shift plastic support (if u dont have the bushes this step is not neccessary)
remove the bolts and washers, then push the metal piece of the OEM bush thru the bottom and squeeze the rubber bushing down after that and remove it
then place the alu bushes so that they slot into the shift support slots that the old bushes were in, they should fit snug in the hole left, then put the bolts back in
should look like fig.2 when done, i cant see any reason why the bushes cant go under the support either, this would lift the support slightly tho, you can test it if you wish i chose to go above tho as it looked nicer
[fig.2]

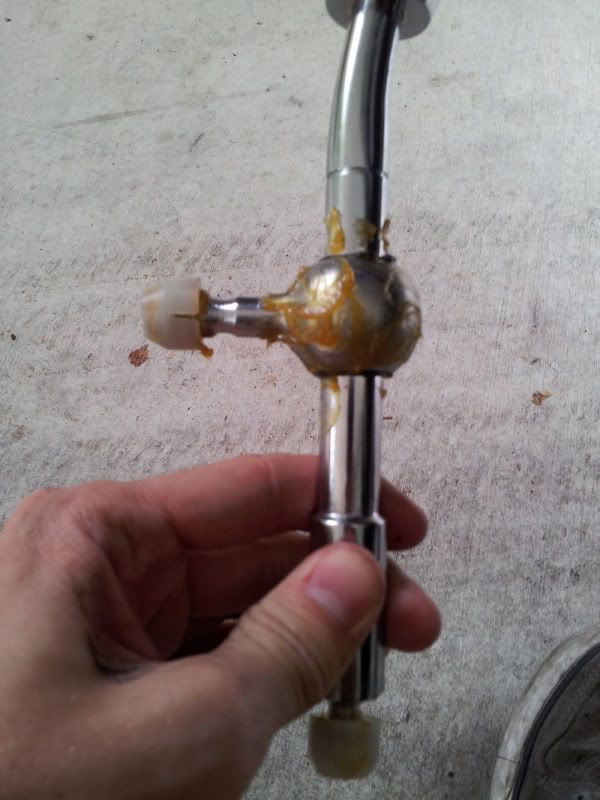
step 4;
now we are going to prepare the new shift stem, firstly you are going to (if you have the UK short shift) remove the upper weight (this is so the piece of plastic we removed earlier will slot back over the shifter, it wont clear the weight. to remove the weight there is a small allen key grub screw, remove that and it reveals a second allen key grub screw in the same hole deeper in, remove both of these.
now as seen in fig.3 grease the main pivot ball and the 2 smaller ones (one located at bottom of shaft the other on the offshoot side shaft end) take off the plastic bushes and grease it up good
this is important as it will keep the shifter working smoothly and prevent wear over time
[fig.3]
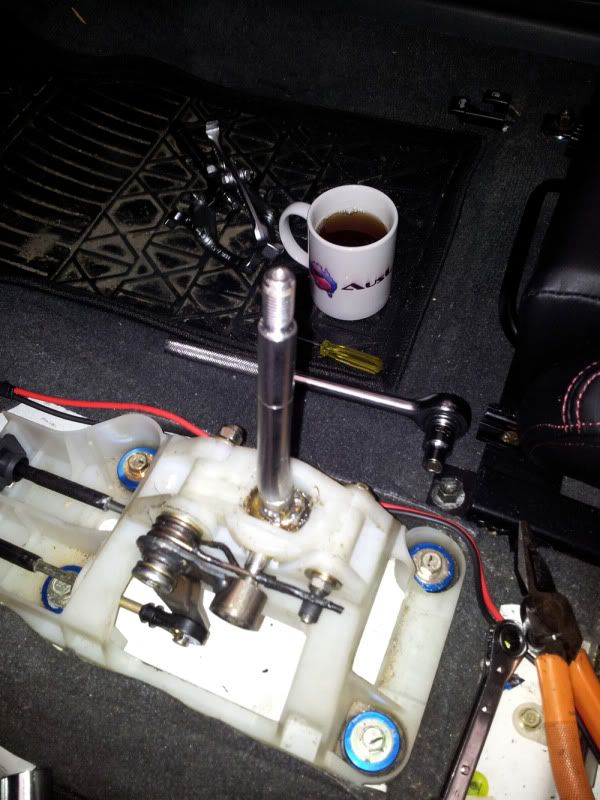
step 5;
put the shifter in its crade on the shift support and place the top cap plastic bit back over, re-attach the bottom connection
put the screws back thru the side making sure everything goes on the way it came off and the spring is going over and under the shift side stem the way it was
after thats okay put the weight back on (if you choose to use it and if it fits with ur knob) fig.4 and fig.5
at this point test to see if it shifts fine, as its easy enuf to go and fix something before the dash pieces are back on
[fig.4]
[fig.5]
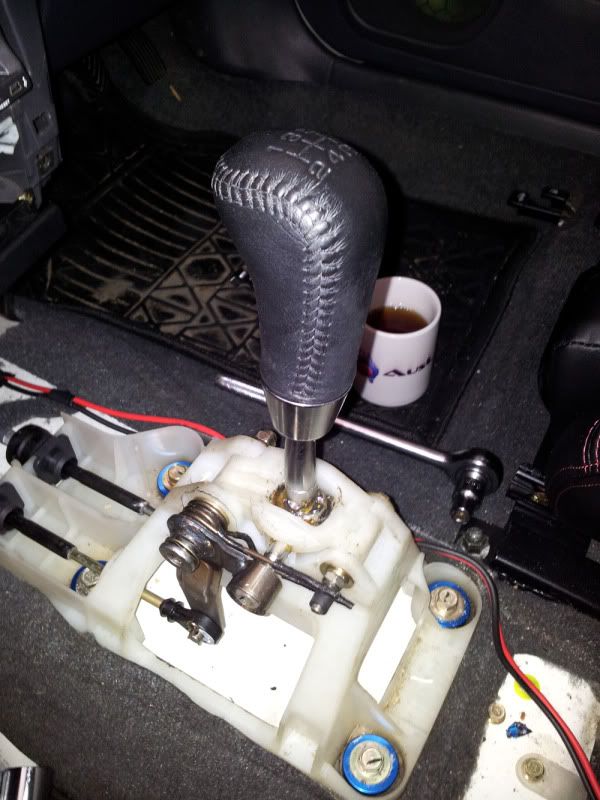
step 5;
put the dash pieces back on and go for a spin to test it out")
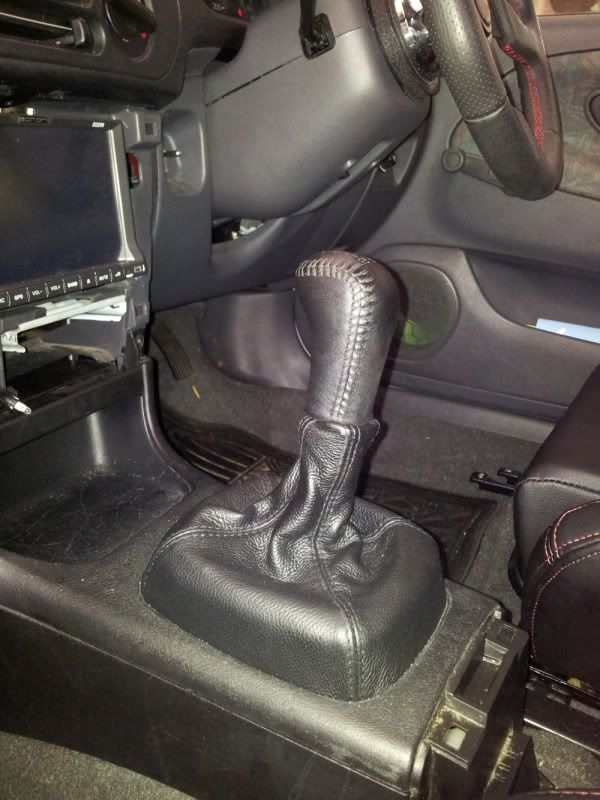
here is mine done and dusted fig.6
[fig.6]
EXTRA INFO
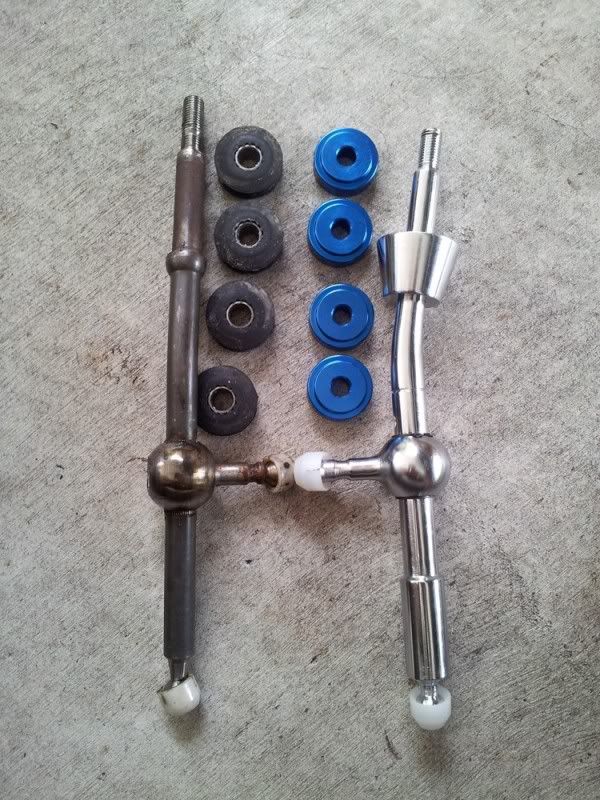
so here is a bit of extra info i had so i thought i'd add it in here
a comparison shot of OEM parts Vs. UK short shift parts
[fig.7]
extra info part 2. the UK short shift like the one i got is adjustable, this is done similar to the way u remove the weight
there are grub screws and clips that hold the main pivot ball in place, remove these and it can be moved the stem is angled at the top, so it can be rotated so u can make it kink in a direction that suits you, you can also move the pivot point up a notch
this is how it came, it shaft angles towards the driver, fig.8 shows it in neautral, and 1st its directly straight up and down center
[fig.8]
i told Ian it probably shortened it ~40%, then i took it for a drive it actually shortens it more like 60% its quite alot shorter
hope you enjoi'd this DIY, any questions feel free to ask
this also goes for other short shifts and OEM shifter replacents
step 1;
grab a phillips head screw driver, and undo the plastic trim around the shifter (refer to diy trim removal thread here: viewtopic.php?f=41&t=175)
okay now u got the trim off, remove the screws as indecated in fig.1, you will require an allen key (i think 8 or 10mm allen) and a 10/12/14mm socket
TAKE NOTE OF THE SPRINGS AND WASHERS AND HOW THE SPRING GOES UNDER AND OVER THE SIDE STEM OF THE SHIFTER, this is very important it goes back the same way
[fig.1]
step 2;
remove the cap over the main pivot point of the shifter, slide it directly up and off the stem of the shifter.
now undo the bottom connection of the shift line, the bush should pop off, and then remove the shift stem from its cradle
step 3;
if you have the UK short shift kit now is the time to swap out the bushings at the base of the shift plastic support (if u dont have the bushes this step is not neccessary)
remove the bolts and washers, then push the metal piece of the OEM bush thru the bottom and squeeze the rubber bushing down after that and remove it
then place the alu bushes so that they slot into the shift support slots that the old bushes were in, they should fit snug in the hole left, then put the bolts back in
should look like fig.2 when done, i cant see any reason why the bushes cant go under the support either, this would lift the support slightly tho, you can test it if you wish i chose to go above tho as it looked nicer
[fig.2]
step 4;
now we are going to prepare the new shift stem, firstly you are going to (if you have the UK short shift) remove the upper weight (this is so the piece of plastic we removed earlier will slot back over the shifter, it wont clear the weight. to remove the weight there is a small allen key grub screw, remove that and it reveals a second allen key grub screw in the same hole deeper in, remove both of these.
now as seen in fig.3 grease the main pivot ball and the 2 smaller ones (one located at bottom of shaft the other on the offshoot side shaft end) take off the plastic bushes and grease it up good
this is important as it will keep the shifter working smoothly and prevent wear over time
[fig.3]
step 5;
put the shifter in its crade on the shift support and place the top cap plastic bit back over, re-attach the bottom connection
put the screws back thru the side making sure everything goes on the way it came off and the spring is going over and under the shift side stem the way it was
after thats okay put the weight back on (if you choose to use it and if it fits with ur knob) fig.4 and fig.5
at this point test to see if it shifts fine, as its easy enuf to go and fix something before the dash pieces are back on
[fig.4]
[fig.5]
step 5;
put the dash pieces back on and go for a spin to test it out
here is mine done and dusted fig.6
[fig.6]
EXTRA INFO
so here is a bit of extra info i had so i thought i'd add it in here
a comparison shot of OEM parts Vs. UK short shift parts
[fig.7]
extra info part 2. the UK short shift like the one i got is adjustable, this is done similar to the way u remove the weight
there are grub screws and clips that hold the main pivot ball in place, remove these and it can be moved the stem is angled at the top, so it can be rotated so u can make it kink in a direction that suits you, you can also move the pivot point up a notch
this is how it came, it shaft angles towards the driver, fig.8 shows it in neautral, and 1st its directly straight up and down center
[fig.8]
i told Ian it probably shortened it ~40%, then i took it for a drive it actually shortens it more like 60% its quite alot shorter
hope you enjoi'd this DIY, any questions feel free to ask