How to Install brand new carpet into your CC Coupe (applies to pretty much any Lancer though)
Before we get started, you need to devote an entire day to this process. Most custom carpets come uncut, so you need to spend a lot of time patiently measuring, planning and cutting away small pieces of carpet at time if you want a nice, clean, flush finish. Obviously I cleaned interior pieces as I pulled them out because they were a little filthy, you don't have to do that.
What you will need:
17mm socket
14mm socket
Philips head screwdriver
Scissors
Stanley Knife
Permanent marker
Kwik Grip adhesive spray
Your new carpet
Underlay
Step One: Remove your front seats and the base of your rear seats. 14mm socket needed for the front seats, and just pull the tabs under the base of the rear seat and pull it out.
Step Two: Remove your centre console and shifter assembly. There are two screws in the bottom of your centre console, another in the small recess near the handbrake. For the shifter assembly, pry off the small plastic plate under the fascia/cig lighter to reveal two screws. Take them out, and there are also screws at the end of each side of the assembly in the footwells, 4 screws in total, then lift it up and out.


Step Three: Remove your kick plates in the doors (just pull them up, they are only clipped in) and the small plastic surrounds at the front of the kick plates on both doors (these are held in by one screw at the back of them). You also need to undo the bottom of the front seatbelts, where the black metal frame bolts trough the carpet and into the floor. Pop off the plastic clips hiding the bolt, and take them out (17mm socket needed here).
Step Four: Rip out your old carpet.

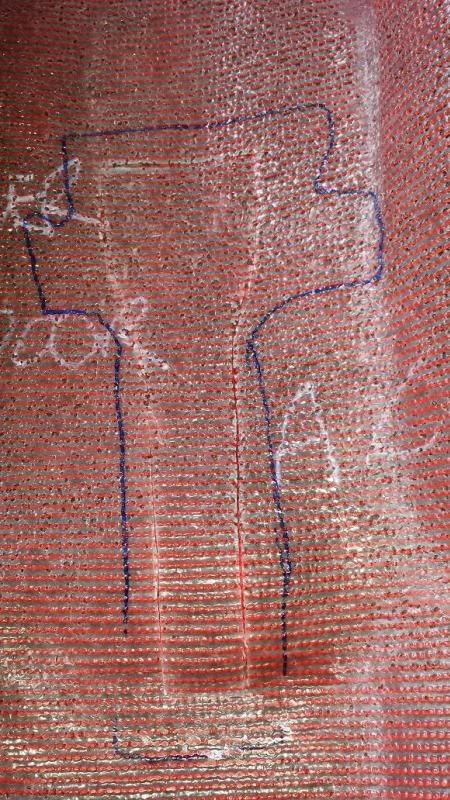
Step Five: Lay your new carpet face down, and your old carpet face down ontop of the new carpet. Start tracing general outlines of where holes will need to go. You want to do this on the bottom of the carpet otherwise you'll probably end up with marks all over your carpet when you're finished.


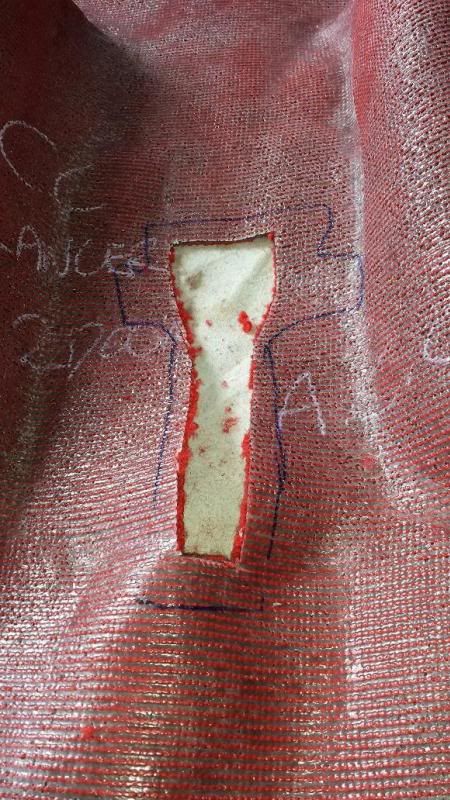
Step Six: Cut out the inside of of the major areas first with the stanley knife (trimming/cutting with the scissors where necessary), leaving 1-2cm of carpet around where you traced. You want to leave some extra carpet because you need to slowly hack away at it to make it fit flush in the car. You can always cut away excess carpet, you can't magically grow extra carpet if you cut away too much. Give it a quick test fit. Cut away where necessary.
Step Seven: When you have a major hole completed (such as where the shifter assembly goes) you can start working on smaller holes, like the bolts for the seats and seatbelts. I found it easier to have the carpet already sitting in the car and cut small slits into the carpet where necessary instead of trying to trace and cut out more holes.


Step Eight: When you feel like your carpet is flush and fits well, take it back out and cut out a small piece of underlay. Spray a hefty amount of Kiwk Grip onto both the bottom of the carpet and the underlay itself, and stick them together. Chuck the carpet back in the car.

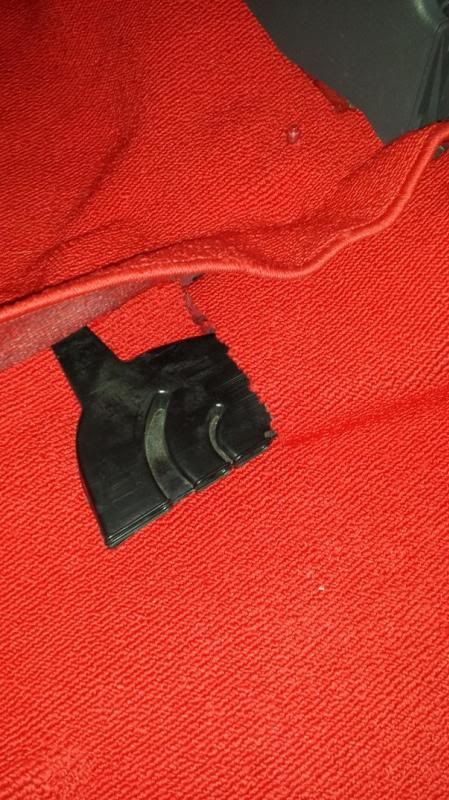
Step Nine: Repeat this process for the rear carpet, noting holes for the tabs in the rear seats and the centre console. There are also these plastic tube thingies on the floor... dunno what they are for (I assume some sort of ventilation) so cut a small hole for them too.

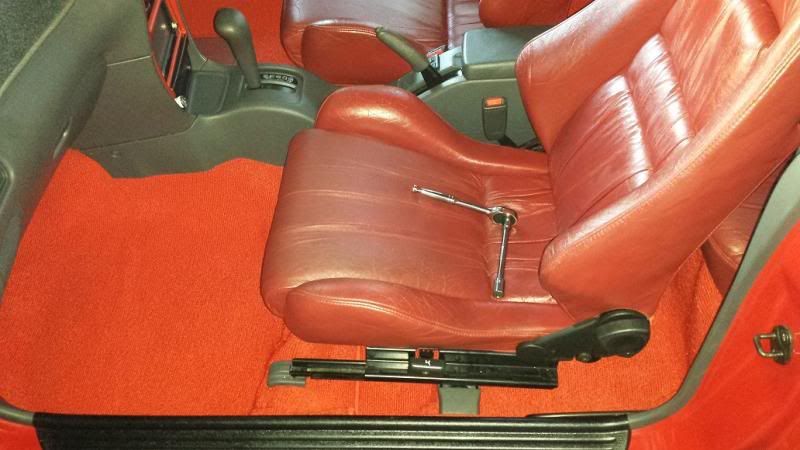
Step Ten: Once you feel like your carpet is as flush as it's going to get and sits nicely, chuck your interior back in and admire your new bling.
Before we get started, you need to devote an entire day to this process. Most custom carpets come uncut, so you need to spend a lot of time patiently measuring, planning and cutting away small pieces of carpet at time if you want a nice, clean, flush finish. Obviously I cleaned interior pieces as I pulled them out because they were a little filthy, you don't have to do that.
What you will need:
17mm socket
14mm socket
Philips head screwdriver
Scissors
Stanley Knife
Permanent marker
Kwik Grip adhesive spray
Your new carpet
Underlay
Step One: Remove your front seats and the base of your rear seats. 14mm socket needed for the front seats, and just pull the tabs under the base of the rear seat and pull it out.
Step Two: Remove your centre console and shifter assembly. There are two screws in the bottom of your centre console, another in the small recess near the handbrake. For the shifter assembly, pry off the small plastic plate under the fascia/cig lighter to reveal two screws. Take them out, and there are also screws at the end of each side of the assembly in the footwells, 4 screws in total, then lift it up and out.
Step Three: Remove your kick plates in the doors (just pull them up, they are only clipped in) and the small plastic surrounds at the front of the kick plates on both doors (these are held in by one screw at the back of them). You also need to undo the bottom of the front seatbelts, where the black metal frame bolts trough the carpet and into the floor. Pop off the plastic clips hiding the bolt, and take them out (17mm socket needed here).
Step Four: Rip out your old carpet.
Step Five: Lay your new carpet face down, and your old carpet face down ontop of the new carpet. Start tracing general outlines of where holes will need to go. You want to do this on the bottom of the carpet otherwise you'll probably end up with marks all over your carpet when you're finished.
Step Six: Cut out the inside of of the major areas first with the stanley knife (trimming/cutting with the scissors where necessary), leaving 1-2cm of carpet around where you traced. You want to leave some extra carpet because you need to slowly hack away at it to make it fit flush in the car. You can always cut away excess carpet, you can't magically grow extra carpet if you cut away too much. Give it a quick test fit. Cut away where necessary.
Step Seven: When you have a major hole completed (such as where the shifter assembly goes) you can start working on smaller holes, like the bolts for the seats and seatbelts. I found it easier to have the carpet already sitting in the car and cut small slits into the carpet where necessary instead of trying to trace and cut out more holes.
Step Eight: When you feel like your carpet is flush and fits well, take it back out and cut out a small piece of underlay. Spray a hefty amount of Kiwk Grip onto both the bottom of the carpet and the underlay itself, and stick them together. Chuck the carpet back in the car.
Step Nine: Repeat this process for the rear carpet, noting holes for the tabs in the rear seats and the centre console. There are also these plastic tube thingies on the floor... dunno what they are for (I assume some sort of ventilation) so cut a small hole for them too.
Step Ten: Once you feel like your carpet is as flush as it's going to get and sits nicely, chuck your interior back in and admire your new bling.
