Because I'm keen to look at this in the future, I've been looking around and found what's below.
It has been linked in a few other threads here before, but to save time searching and what not, we can use it for our benefit.
Please Note: I did not write this DIY, I found it on another forum, that lifted it from MLGA over 2 years ago.
I did look around MLGA, but it wasn't exactly obvious if it is there, so this maybe the last lancer/mirage type place to find it.
If anyone with first hand experience wants to add some more info or correct any inaccuracy's, let me know and I'll edit this post.
As found on: http://www.insanegrunt.com/forum/showth ... -ce-lancer
I'll also add that one of our members here, Dawn16 linked this as a place you can get a FTO front cut - http://ichiban.com.au/
And v8maniac added this in this thread viewtopic.php?f=8&t=2181
It has been linked in a few other threads here before, but to save time searching and what not, we can use it for our benefit.
Please Note: I did not write this DIY, I found it on another forum, that lifted it from MLGA over 2 years ago.
I did look around MLGA, but it wasn't exactly obvious if it is there, so this maybe the last lancer/mirage type place to find it.
If anyone with first hand experience wants to add some more info or correct any inaccuracy's, let me know and I'll edit this post.
As found on: http://www.insanegrunt.com/forum/showth ... -ce-lancer
How to install 6A12 into your CE lancer
As I have told a few members, it can happen.
Parts you'll need:
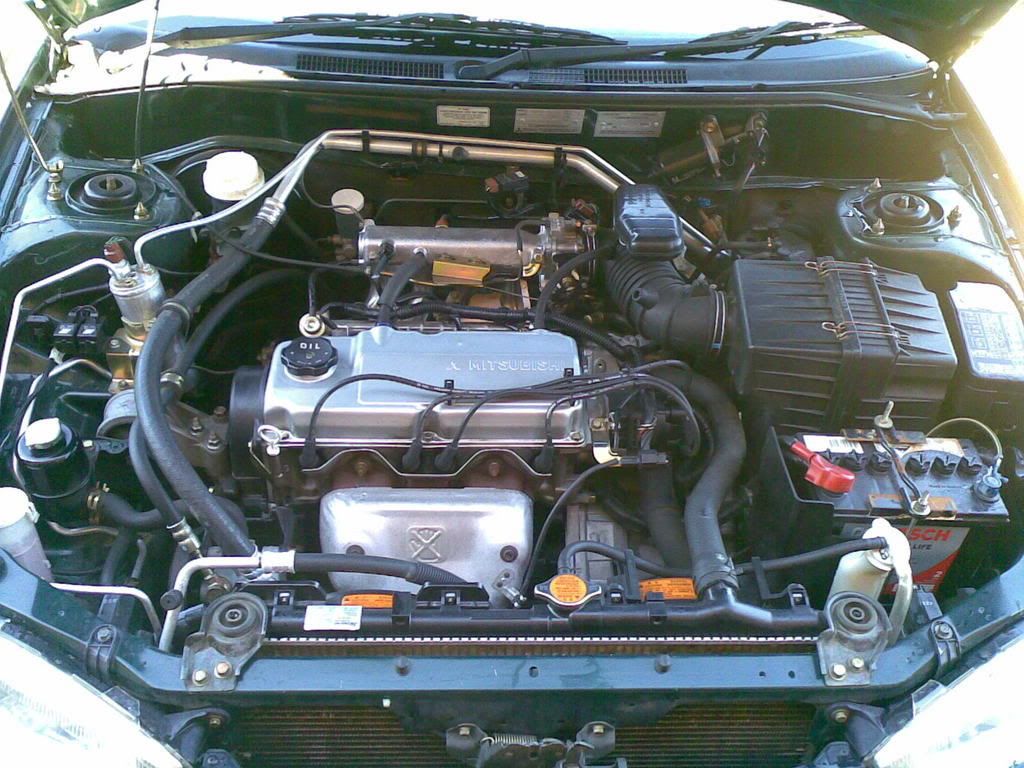
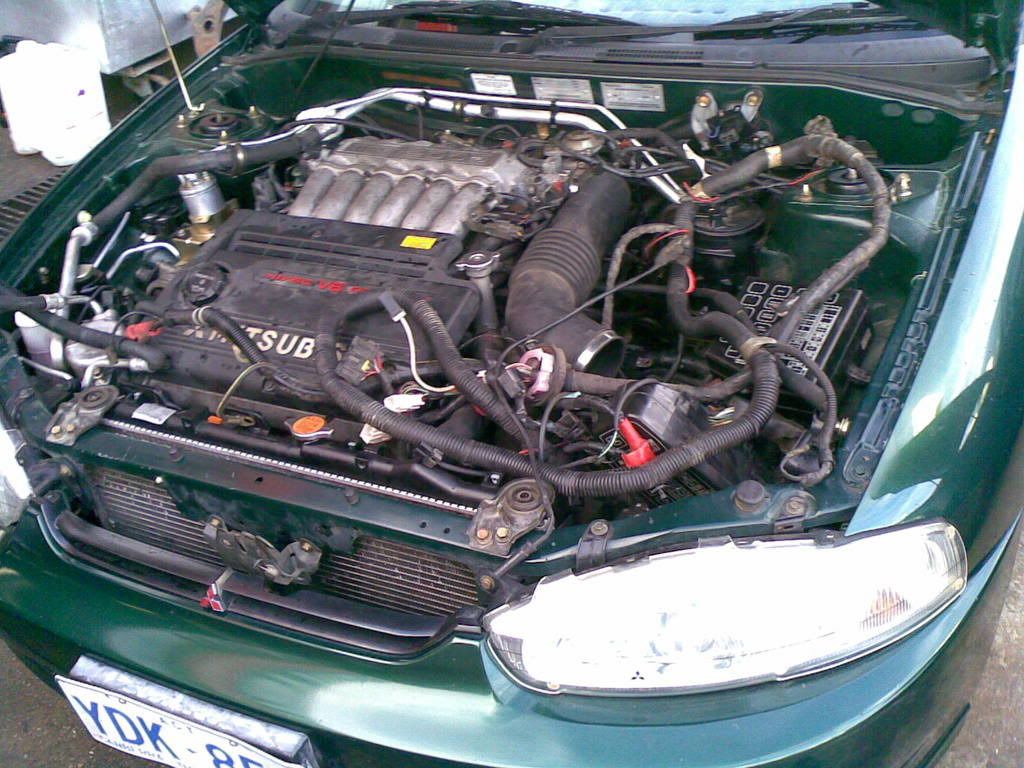
6A12 Engine (mivec or non) *note turbo and twin turbo setups are possible (best option is to get a FTO front cut and it comes with everything you need - manual mivecs are hard to find, but you can find it)
Gearbox to match up to the 6A12
FTO wiring loom
FTO front and rear axles (if doing a 5 stud conversion)
Heavy duty clutch and pressure plate with new bearings (make sure its for the gearbox)
Engine Oil (synthetic would be best)
Gearbox oil
Brake Fluid
New springs and struts (fronts are most important)
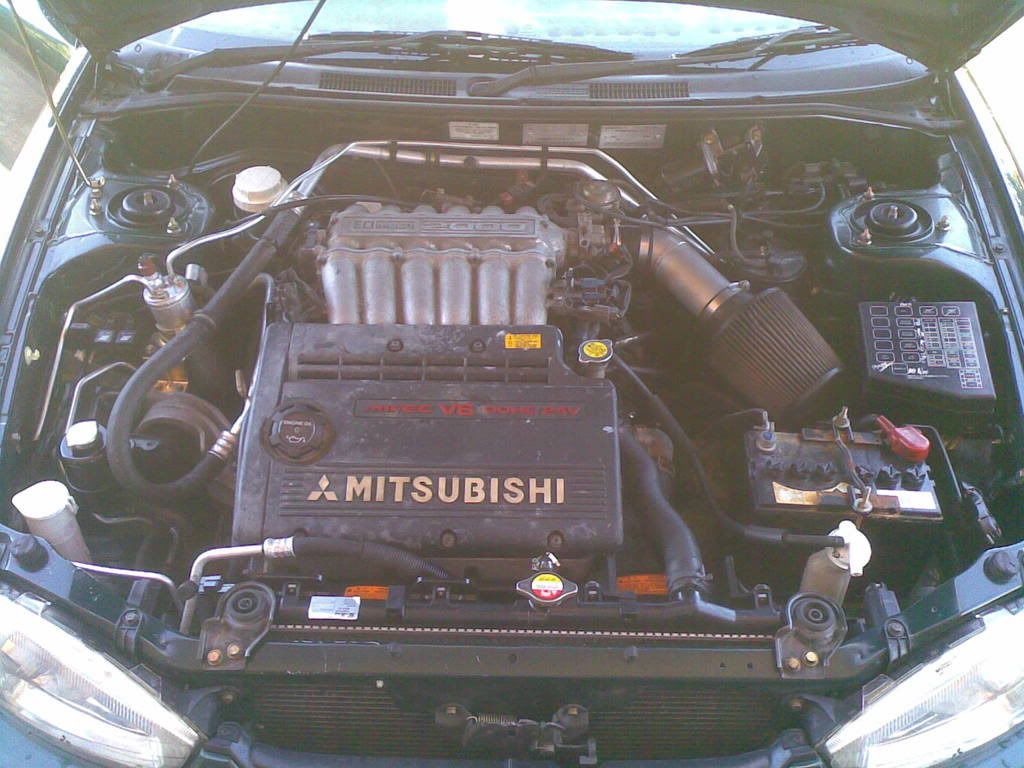
First off, you'll have to take the 1.5 out.. start by disconnecting the battery and putting it aside. Next, disconnect the wiring loom but do not pull out the whole loom unless running an aftermarket ECU, for this guide, we will be sticking to the standard factory FTO ECU. After that has been done and tucked away, empty the radiator and remove it. Empty the brake reservoir and disconnect the fuel lines. Then disconnect the exhaust and intake piping. If you're currently running a manual system, disconnect the manual cables and the clutch. CV axels needs to be disconnected from gearbox. Next take the air con unit if present out but do not cut any pipings as air con needs to be degassed by a professional. *NOTE air con gasses are harmful to your health. Start by disconnecting the rest of the stuff that is connected to the motor and gearbox like power steering pulleys etc etc.. Once everything is disconnected, you'll need a mate to help you get the old engine out, even tho its a small 1.5 it weighs about 150 to 200kg.. so you'll also need a engine jack. Hook the chain up to the motor and lift it slightly.. still stuck?? ahhh you need to put a bit of tension before you start removing the bolts mounting the engine to the chassis.. Once everything is out, do the same to the FTO half cut..
For your convenience later, do it right the first time, and by that i mean once the FTO motor is sitting on your garage floor get to work!! check for engine damage. Things like the sump, water pump, the conditions of drive belts, the inlet manifold, alternator, starter motor and little bits and pieces.. be extremely precise as a 2 hour job with your motor sitting on the floor is going to take 5 hours when it is sitting in your engine bay. Next start replacing the timing belt and fan belts. This will ensure you get a good start and not replacing everything later. As with my half cut, my engine sump was damaged and water pump was leaking, so off to panel beat the sump out and replaced the water pump for a new one. I also replaced my flywheel for a lightweight billet one.. although the old one works fine, you might want to take it to a machining shop and machine the flywheel. Check your spark plugs as well, as 3 of the spark plugs are underneath the inlet manifold, it is a good thing to have them checked and replaced now if needed. I replaced all 6 of mine with NGK Group 2 spark plugs. Get yourself an injector service kit and check your injectors flow and refilter and seal it all up after you're done. Next, check the gearbox like you did with your engine. Replace the clutch for a heavy duty one if needed. A solid single plate will suffice, if you have the cash to blow, a twin plate would be the go. A good guide is to see if your clutch can last for more that 12 months, if it does not look like it.. Replace it! The last thing you want is slipping on gear changes.
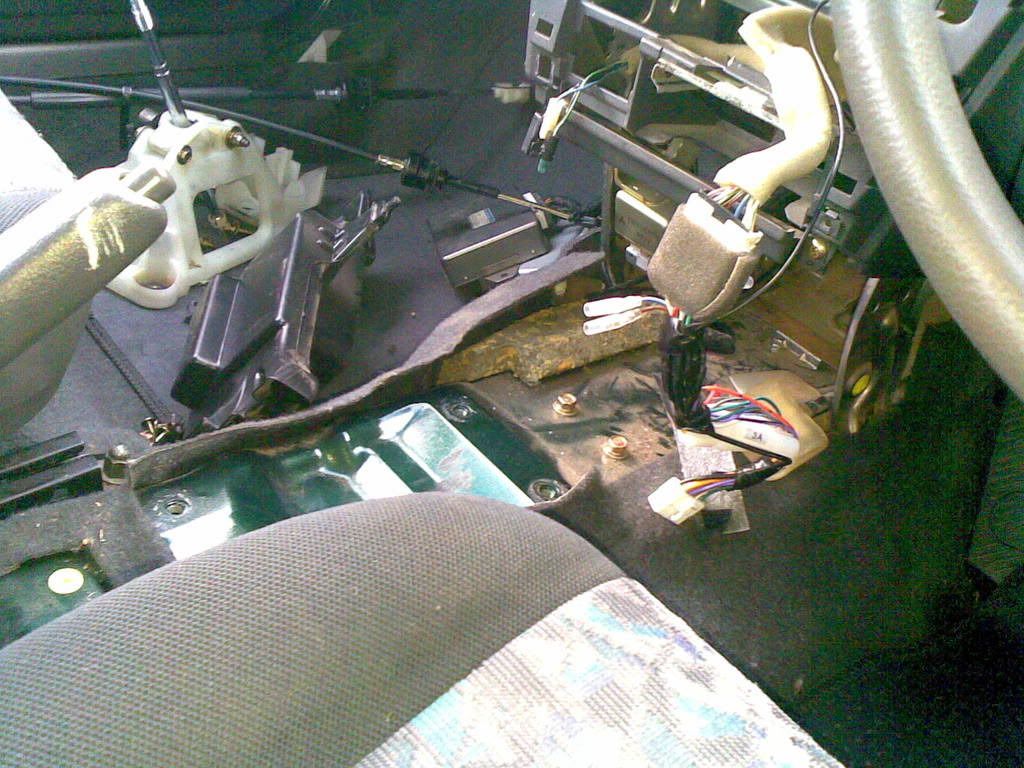
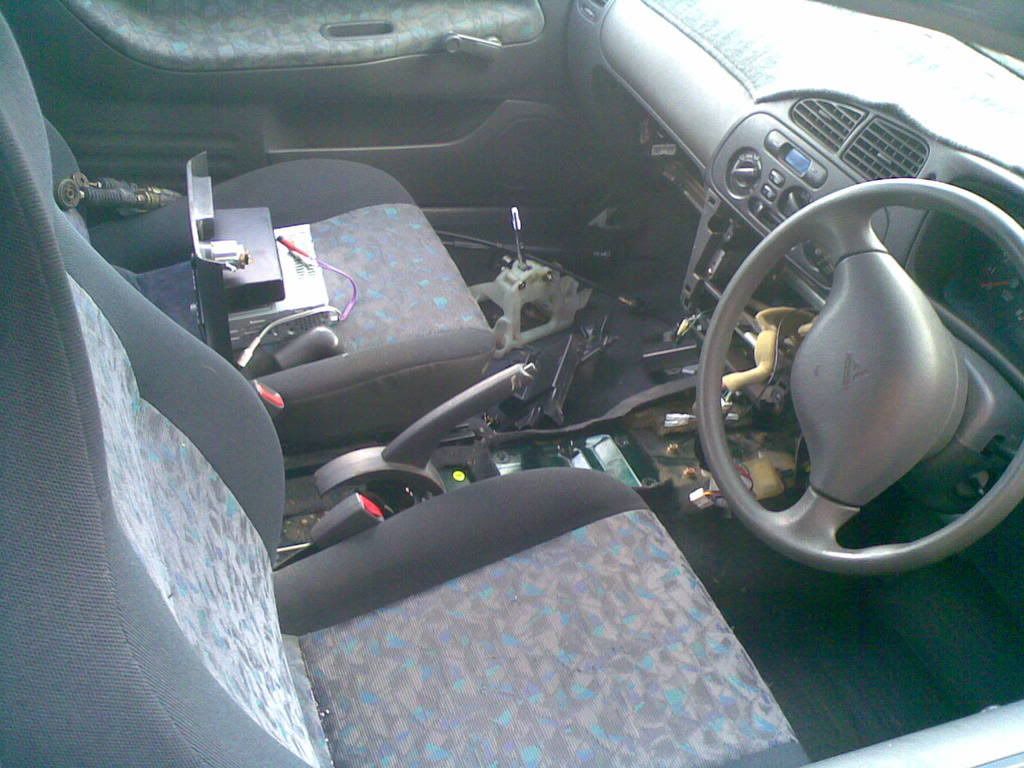
Once everything is mickey mouse, start removing the ECU which is located under the glove box. Pull it all out of the grommet through the firewall just underneath the speed sensor (rpm signal wire). Next pull the FTO ecu to where your old ECU was and start running wires!!! A handy thing to note, get a mate who is an auto electrician!! Remount the engine and gearbox after getting the harness for interior through the grommet. Once in, find wiring diagrams for CE lancers and FTO GPX which in this case was the half cut model. Some people who have done this conversion used the CE fuse box, however I swapped it all out for the FTO one if ever in any case i need to run more wires to run abs or srs airbags, there will be wirings and fuses there as the CE lancer lacks it. For my FTO conversion, i spliced the 2 wiring harness as one. You could pull the whole lancer loom out and re-run the FTO loom, but why cause yourself more headache? just splice it and run it as one harness. *NOTE - CE lancer wiring is easy to find, FTO however requires abit more searching as there are different wiring diagrams for different models, CE lancer share the same wiring. After wiring it all up and make sure you double check everything, as you do not, I REPEAT, DO NOT want to have a looped earth.
Once your happy with everything, tape it all up with black electrical tape and start putting it all back together. Replace all fluids and fire her up and hear her roar..running a stock exhuast still, i'm making about 120kw at the threads with 161NM of torque.. with freed up exhuast and proper 3-1 headers expect more torque and about 130kws..
Things to note
- If using the factory radiator, either replace with slimline fans or move the radiator forward.
- Air condition pipe has to be cut shorter for it to fit with the compressor and next to the power steering
- Power steering reservoir has to be moved about 10mm to the right to make space for air con unit.
- FTO driveshafts can be connected to lancer/mirage outer CV joints
- If you have an existing tacho, it will not work! Either get an aftermarket one, or fabricate to fit the FTO dash cluster.
Front Brake Upgrade (similar to swapping over FTO brakes, just have it redrilled to suit 4 x 100 if running lancer/mirage hubs) (Taken from Mirage Performance Forums)
Caliper and Rotor Installation Process
* Procedures are done to both sides unless otherwise specified, and assume reasonable mechanical ability.
Tools
-torque wrench
-12mm, 17mm sockets
-8mm/10mm bleeder wrench
-adjustable pliers
1. Jack front of car and set on jack stands.
2. Remove wheels.
3. Place pan of some kind under caliper and remove banjo bolt. Let fluid drain into pan.
4. Remove both caliper to spindle bolts and remove caliper assembly.
5. Thread bolts into removal holes between lugs in order to pop old rotor free.
6. Clean hub surface with wire brush and spray with brake parts cleaner.
7. Bend or cut lip on dust shield appropriately to prevent interference with rotor.
8. Install new rotor and secure with two lug nuts.
* If lug holes are not snug wrap thin strips of aluminum foil around base of threads to prevent excess play of the rotor, or install hub rings shaved to thickness of rotor face.
9. Install new caliper bracket on spindle and torque to 65 ft/lbs.
10. Install hardware and pads.
11. Reset caliper pistons in their bores if necessary.
12. Install caliper body with the lock pin (L) in the top hole, and the guide pin (G) on the bottom with liberal caliper grease on each and torque both to 55 ft/lbs.
* Note: Bleed screw must point upward.
13. Install crush washer on banjo bolt insert into banjo on hose, place two washers on bolt after banjo then bolt to caliper and torque to 21 ft/lbs.
14. Fill reservoir to MAX and bleed new caliper.
--Repeat on other side of vehicle.
Note: When removing flare nuts to add stainless brake hoses or when replacing the master cylinder, it is recommended to use a 10mm flare nut wrench, or I used a small self-adjusting pipe wrench. Using a regular wrench will result in a rounded nut, which is more of a pain to replace than just about anything else on the car.
This is a guide only, any works done by yourself, are at your own risk. IAF recommends consulting with or engaging the services of a licensed and insured automotive mechanic.
NOTE: THIS IS NOT MY WORK, THIS WAS TAKEN FROM MLGA.
I'll also add that one of our members here, Dawn16 linked this as a place you can get a FTO front cut - http://ichiban.com.au/
And v8maniac added this in this thread viewtopic.php?f=8&t=2181
use the fto ac line's and power steering hoses,
lancer radiator will fit with fto hoses and heater hoses
use fto engine mounts
use lancer air box
use fto accelerator cable
trim engine cover a little to clear the thermo fans as it all a very tight fit and alot of fun and swearing to get radiator and fans in think i had to put fans down first then slide radiator in
wiring is a head f**k that side is not plug and play
get the fto dash if possible with abit of mucking about it will fit into the standard lancer guage hole but plugs need to be rewired
Need a new exhaust as the fto headers finish further under car than the lancer ones do but they do fit and don't need to be replaced
need to change shifter mechanism on gearbox for the lancer one and the lancer shifter cables will hook up
need the fto clutch master and slave.
The main engine side of the change you can do in a weekend. it took me nearly a week to wire it all up though.
All up lancer 6a12 conversion cost about 2500