lancer1993
Active Member
Okay here is a quick guide to replacing a leaky valve cover gasket and painting the cover while you have it off!
This is for the 4G93 but the same basic steps apply for other engines.
First it's recommended to do this in a closed garage as your engine will be exposed for 1 or 2 nights, don't want added moisture inside the engine.
You'll need some basic tools
- 10 and 12 mm sockets
- Small screw driver
- Sand paper
- Metho to clean the surface
- Heat proof paint, I went with undercoat and clearcoat to do the job but you might get away with just the color you want.
- Replacement gasket kit, make sure you get the kit with spark plus rings and O ring for the filler cap.
Step 1
Start by taking out the spark plug leads, as you can see if the seal has been leaking there might be oil onside them. Clean any dripping oil and lay on top of the intake manifold, out of the way.
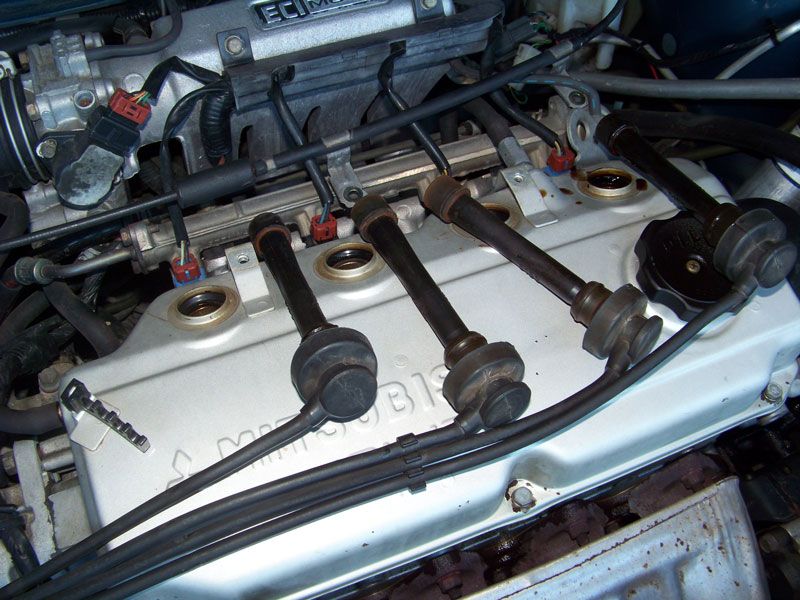
Unbolt the throttle cable holders and push out of the way, it might need to be tied back with some string.
Disconnect any hoses off the cover and undo the 6 bolts that hold the cover on. Put them in an old tin or safely some place, don't want to loose them.
Step 2
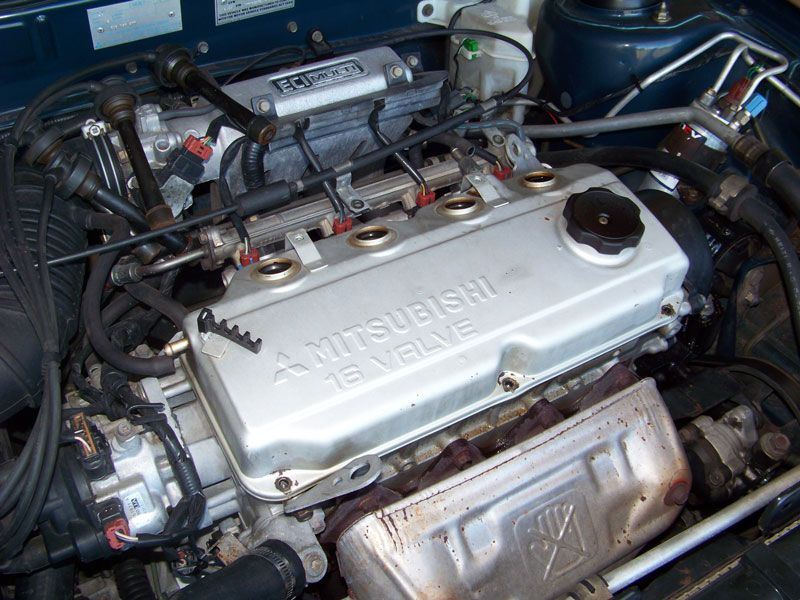
Pull the cover off, might need to do this on an angle to clear parts of the motor.
Step 3
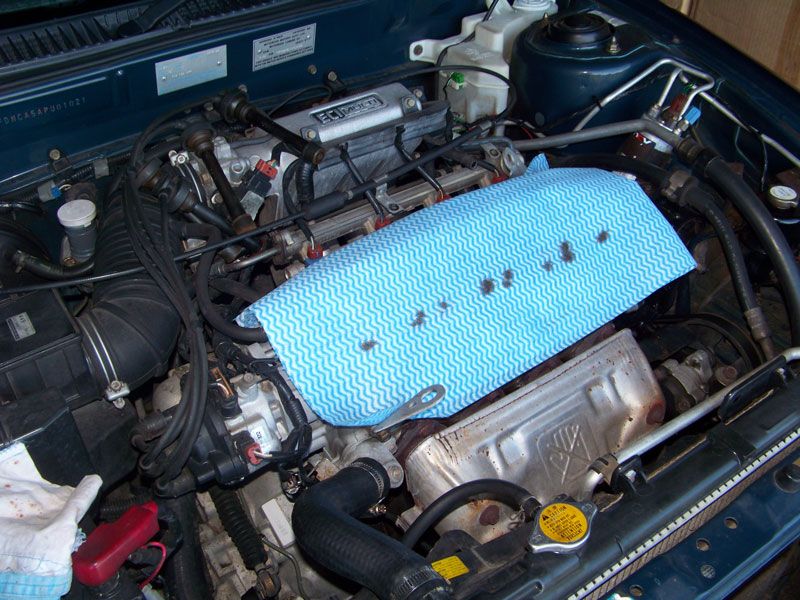
Cover the engine with a clean cloth, not paper. And close the bonnet when not working on the engine, to keep dust or water out.
Step 4
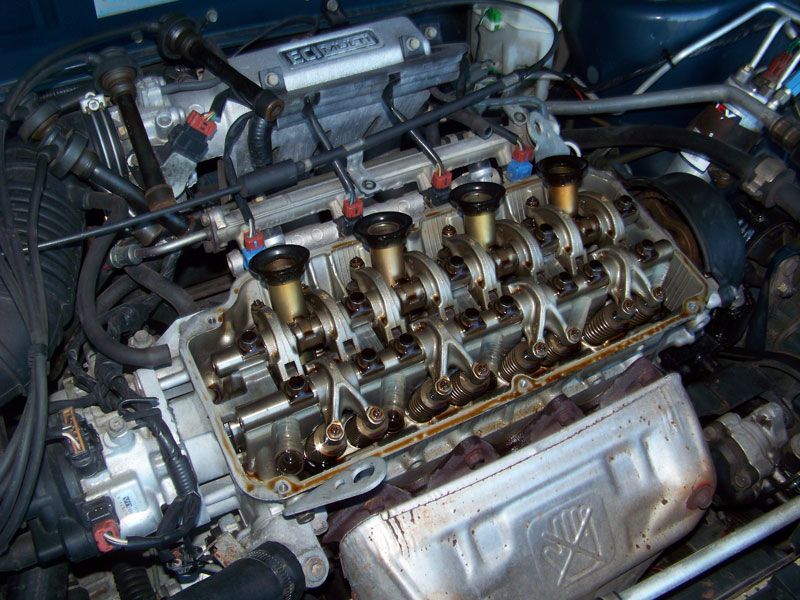
The gasket should come out with the help of a small screw driver to pry it out of the grove.
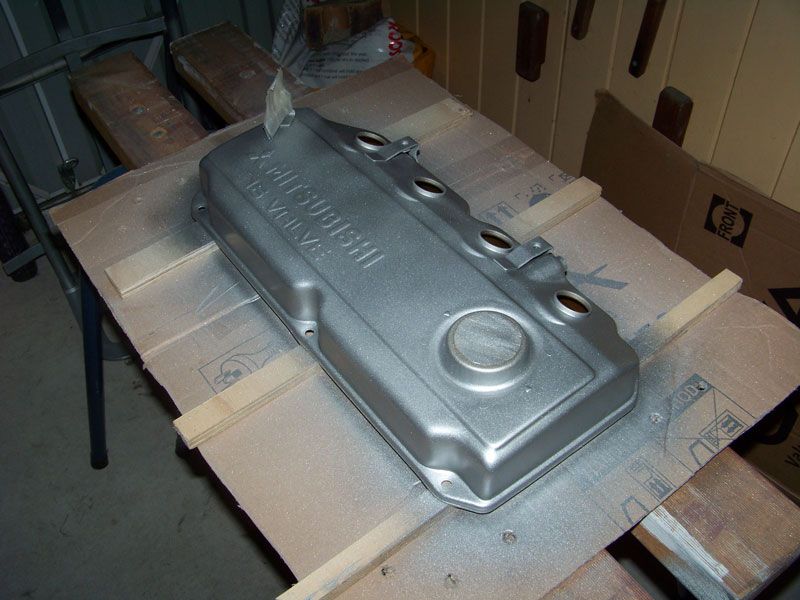
Clean off any excess oil and start rubbing down the the surface, pay attention to any pain chips. Use a fine sandpaper 200 or better. Do this on a clean surface, maybe use paper to limit the mess. Try not getting the dust inside the cover. Clean the surface of oil and loose dust with metho.
I wasn't able to remove the plastic bracket that holds the spark plug leads in place, just cover it it with masking tape. Also cover the end of the places those hoses attach to. The one on the back can be removed. Also cover the filler hole to limit the paint going inside, I didn't bother with the spark plug holes.
Follow the paints instructions and take your time and remember you can't use normal paint on a hot engine so pay the extra and get the right paint.
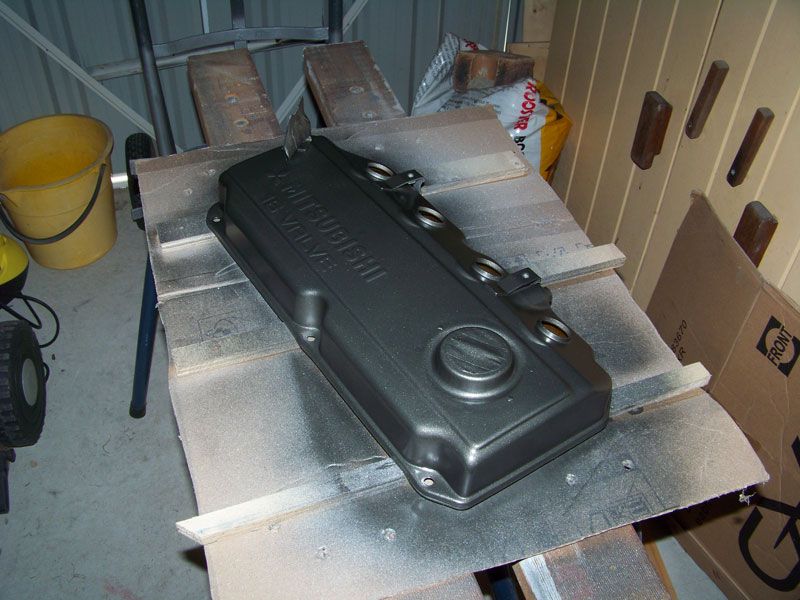
Another trick I was told, if you want you cover to match the car color then get some made up (about $30 a can) Paint the cover with the base or undercoat, once dry do the color coat. Then do a clear coat, this should 'lock in' the color and protect it.
Color and and clear coat done... wait for it to dry.
Step 5
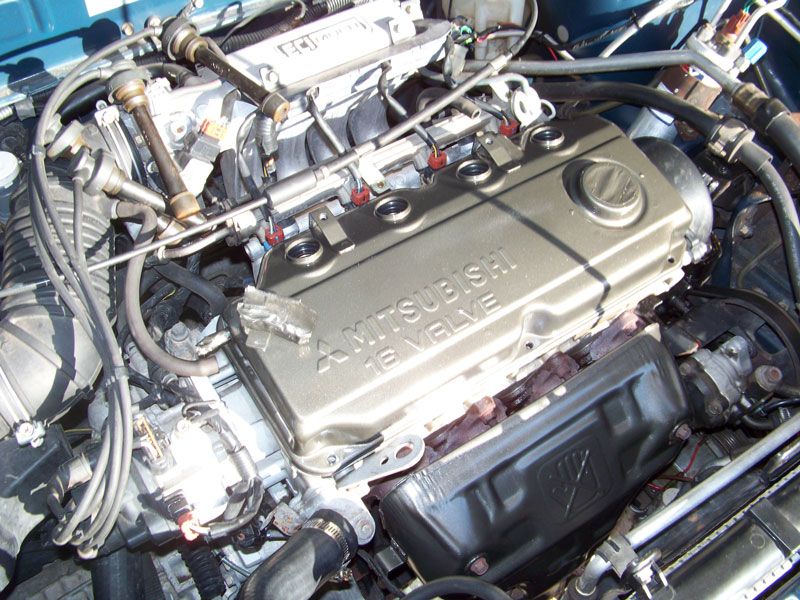
Once dry put things back together. The new casket should go strait back in, lay the cover on an old towel to prevent scratching the new paint.
Take off the spark plug rings and clean up the edge where the gasket will go and the spark plug holes. Put the new spark plug rings back on... You can do this job while the paint is drying.
Don't over tighten the bolts and do them in a pattern like diagonal corners then the middle ones. You might want a torque wrench but its hard finding one that will do the 3.3Nm needed. I just did it by hand. Before taking off the cover note how tight they are.
Double check all parts are in place before starting the engine. Run it and check for leaks, the heat of the engine with help cure the paint, note it might smell of paint at times until it's cured.
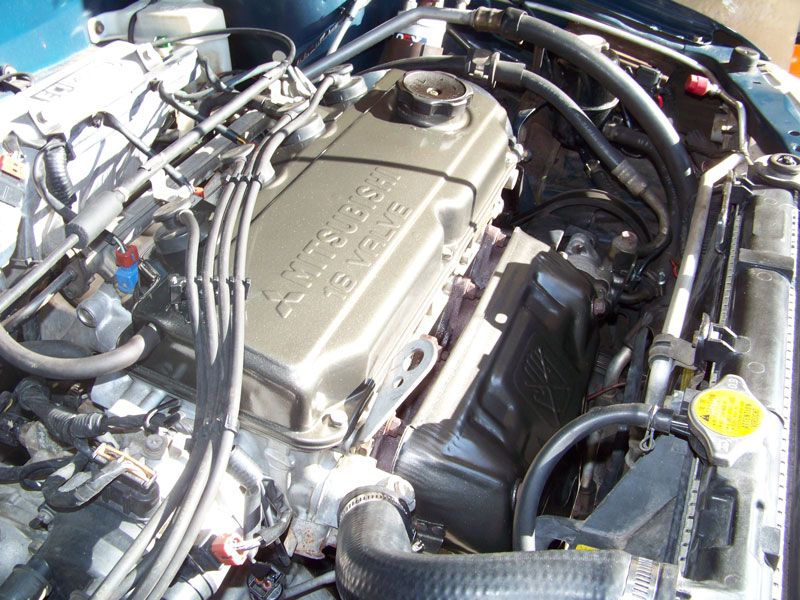
It's recommend not to touch or clean the new paint for at least a week, let the engine heat help cure the paint, the longer you don't touch it the better and try keeping oils away from it.
After a drive check for any leaks, do this periodically for the next week and tighten if any leaks are found, but don't go crazy.
One last thing, the kit also came with a replacement ring for the filler cap. My cap has a screw in the center and nut on the inside, undo this is the easiest (and only) way to safely replace the ring. Takes a few minutes and can help seal the system as like the other rubbers it goes hard over time. Make sure the nut is tight as you don't want it dropping off inside your engine, might be worth using locktite.
Job #2 - Heat Shield.
While I was at it I decided to so the heat shield on the exhaust manifold, the biggest issue for my car was the 2nd radiator fan.
As you can see there is not much room.
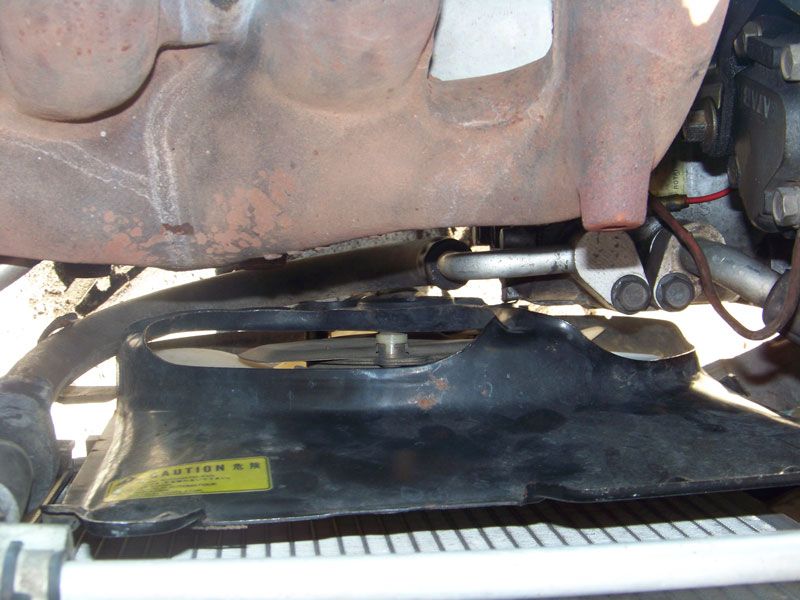
You may need to unbolt and drop the fan down, undo the fan wiring and there is a clamp that goes around the air-con line.
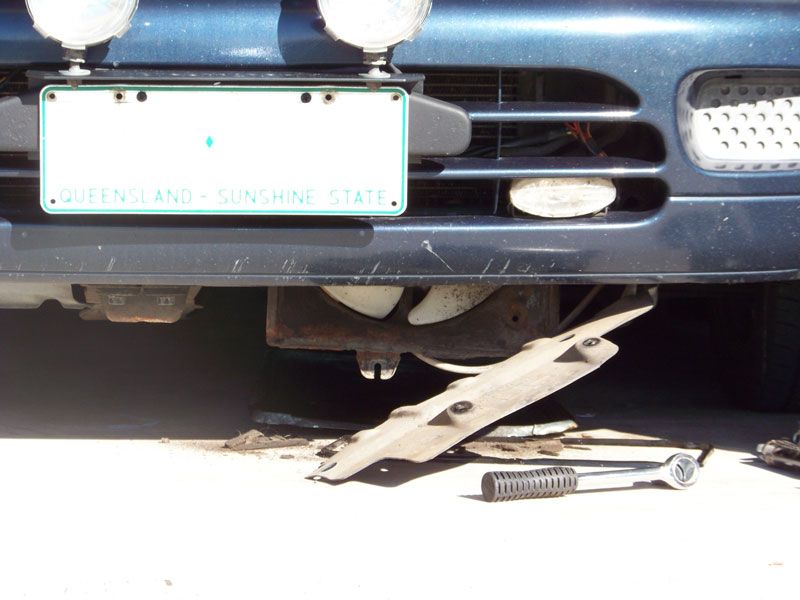
You will also been to unbolt the plastic stone shield which is under the front and drop it out of the way.
Note the rust on the fan shroud, its my next job to take it off, which will require running the car up onto ramps to get the clearance to drop it out.
Unbolt the shield, there were 7 bolts on my 4G93, they might be tight and you may need a ring spanner for this job, combo of 10-12mm.
When all bolts are out, you may need to wiggle it to work it out, the main fan might also be in the way but you should be able to clear it.
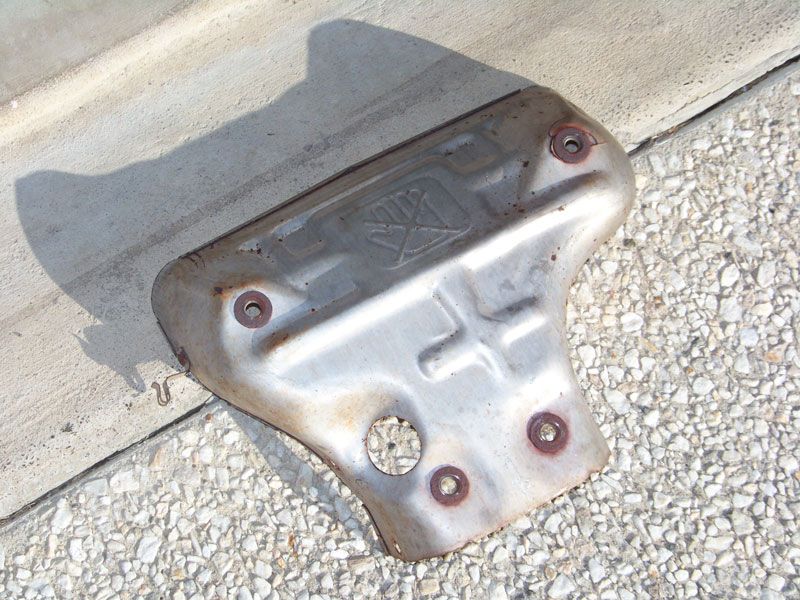
Once out clean it up with some sand paper and metho then paint. I only did it with the heat proof color and didn't bother with the undercoat or clear coat and it still looked good. Well worth the work so it now matches my new color engine cover.

Last note, there is some foam that runs between the fan shroud and radiator, over time this breaks down, on mine it went to dust. I haven't replaced it yet but you should be able to find some replacement at an auto shop or hardware store. Its similar foam seals used on some doors and windows.
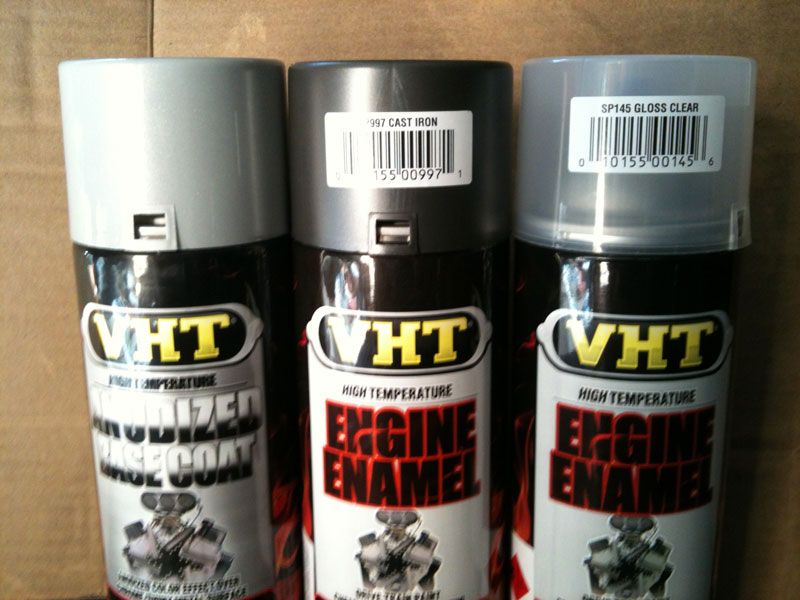
Here is the paint I used.
The color is Cast Iron (SP997)
Hope this helps, please let me know of any errors or clarifications.
This is for the 4G93 but the same basic steps apply for other engines.
First it's recommended to do this in a closed garage as your engine will be exposed for 1 or 2 nights, don't want added moisture inside the engine.
You'll need some basic tools
- 10 and 12 mm sockets
- Small screw driver
- Sand paper
- Metho to clean the surface
- Heat proof paint, I went with undercoat and clearcoat to do the job but you might get away with just the color you want.
- Replacement gasket kit, make sure you get the kit with spark plus rings and O ring for the filler cap.
Step 1
Start by taking out the spark plug leads, as you can see if the seal has been leaking there might be oil onside them. Clean any dripping oil and lay on top of the intake manifold, out of the way.

Unbolt the throttle cable holders and push out of the way, it might need to be tied back with some string.
Disconnect any hoses off the cover and undo the 6 bolts that hold the cover on. Put them in an old tin or safely some place, don't want to loose them.

Step 2
Pull the cover off, might need to do this on an angle to clear parts of the motor.

Step 3
Cover the engine with a clean cloth, not paper. And close the bonnet when not working on the engine, to keep dust or water out.

Step 4
The gasket should come out with the help of a small screw driver to pry it out of the grove.
Clean off any excess oil and start rubbing down the the surface, pay attention to any pain chips. Use a fine sandpaper 200 or better. Do this on a clean surface, maybe use paper to limit the mess. Try not getting the dust inside the cover. Clean the surface of oil and loose dust with metho.
I wasn't able to remove the plastic bracket that holds the spark plug leads in place, just cover it it with masking tape. Also cover the end of the places those hoses attach to. The one on the back can be removed. Also cover the filler hole to limit the paint going inside, I didn't bother with the spark plug holes.
Follow the paints instructions and take your time and remember you can't use normal paint on a hot engine so pay the extra and get the right paint.

Another trick I was told, if you want you cover to match the car color then get some made up (about $30 a can) Paint the cover with the base or undercoat, once dry do the color coat. Then do a clear coat, this should 'lock in' the color and protect it.
Color and and clear coat done... wait for it to dry.

Step 5
Once dry put things back together. The new casket should go strait back in, lay the cover on an old towel to prevent scratching the new paint.
Take off the spark plug rings and clean up the edge where the gasket will go and the spark plug holes. Put the new spark plug rings back on... You can do this job while the paint is drying.

Don't over tighten the bolts and do them in a pattern like diagonal corners then the middle ones. You might want a torque wrench but its hard finding one that will do the 3.3Nm needed. I just did it by hand. Before taking off the cover note how tight they are.
Double check all parts are in place before starting the engine. Run it and check for leaks, the heat of the engine with help cure the paint, note it might smell of paint at times until it's cured.

It's recommend not to touch or clean the new paint for at least a week, let the engine heat help cure the paint, the longer you don't touch it the better and try keeping oils away from it.
After a drive check for any leaks, do this periodically for the next week and tighten if any leaks are found, but don't go crazy.
One last thing, the kit also came with a replacement ring for the filler cap. My cap has a screw in the center and nut on the inside, undo this is the easiest (and only) way to safely replace the ring. Takes a few minutes and can help seal the system as like the other rubbers it goes hard over time. Make sure the nut is tight as you don't want it dropping off inside your engine, might be worth using locktite.
Job #2 - Heat Shield.
While I was at it I decided to so the heat shield on the exhaust manifold, the biggest issue for my car was the 2nd radiator fan.

As you can see there is not much room.

You may need to unbolt and drop the fan down, undo the fan wiring and there is a clamp that goes around the air-con line.
You will also been to unbolt the plastic stone shield which is under the front and drop it out of the way.

Note the rust on the fan shroud, its my next job to take it off, which will require running the car up onto ramps to get the clearance to drop it out.
Unbolt the shield, there were 7 bolts on my 4G93, they might be tight and you may need a ring spanner for this job, combo of 10-12mm.
When all bolts are out, you may need to wiggle it to work it out, the main fan might also be in the way but you should be able to clear it.
Once out clean it up with some sand paper and metho then paint. I only did it with the heat proof color and didn't bother with the undercoat or clear coat and it still looked good. Well worth the work so it now matches my new color engine cover.

Last note, there is some foam that runs between the fan shroud and radiator, over time this breaks down, on mine it went to dust. I haven't replaced it yet but you should be able to find some replacement at an auto shop or hardware store. Its similar foam seals used on some doors and windows.
Here is the paint I used.
The color is Cast Iron (SP997)

Hope this helps, please let me know of any errors or clarifications.
