You are using an out of date browser. It may not display this or other websites correctly.
You should upgrade or use an alternative browser.
You should upgrade or use an alternative browser.
Riley's CE Coupe 4G94 2.1L Build
- Thread starter Starke02
- Start date
Cleanmin
Active Member
Hell yeah man, glad the lights went In easy enough, the 1.5's look brilliant with the candy cane reflectors. +1 for the door handles, look way better, that will be my next little project when I have the door cards off next. same as the mirrors I think. Big brakes will be life-changing, to say the least, especially with the brake booster. I kind of wish I went for the 276mm rotors so I could stick with 15 inch rims. Either way man, looking great. Keep us posted
barreh13a
Active Member
you could look at moving the battery in between the fuse box and the maf, pretty sure its a common thing to do on evo's, then bring the filter right in close to the back of the headlight, that's probably the best spot in regards to cool air as well as being out of the way of water, similar to this in regards to location

when do you plan on fitting all the engine parts? really keen to see what power you get out of this setup. I plan on throwing a few performance head parts into my 4g69 once its in my mirage, especially a cam and springs, but very keen to see how the ported head works out for you")
when do you plan on fitting all the engine parts? really keen to see what power you get out of this setup. I plan on throwing a few performance head parts into my 4g69 once its in my mirage, especially a cam and springs, but very keen to see how the ported head works out for you
Starke02
Active Member
Yeah bro I'm going to move it to the boot for a little bit of weight distribution. Then when thats all sorted I can move the intake behind the headlight.you could look at moving the battery in between the fuse box and the maf, pretty sure its a common thing to do on evo's, then bring the filter right in close to the back of the headlight, that's probably the best spot in regards to cool air as well as being out of the way of water, similar to this in regards to location
View attachment 8967
when do you plan on fitting all the engine parts? really keen to see what power you get out of this setup. I plan on throwing a few performance head parts into my 4g69 once its in my mirage, especially a cam and springs, but very keen to see how the ported head works out for you
Well I'm just waiting in the last piece if the puzzle; the 70mm throttle body, which hopefully should be coming in rlly soon. Once I can get that then I'll be able to dedicate a whole weekend to putting everything together. I rlly rlly hope I can get everything finished and tuned by the middle of nxt month but we'll see. In the meantime I've gotta gasket match both the intake and exhaust ports. I've got some dye ready so I can see where i need to cut and ill probs end up doing that this weekend.
I have absolutely no doubt that I can achieve 40hp more from the entire set up. So thatll be a minimum of 153hp. But If I can push it to 160 man thatd just be amazing. The huge bump in compression and the cam should rlly help me get to those sort of numbers.
Starke02
Active Member
Yeah man 100%Hell yeah man, glad the lights went In easy enough, the 1.5's look brilliant with the candy cane reflectors. +1 for the door handles, look way better, that will be my next little project when I have the door cards off next. same as the mirrors I think. Big brakes will be life-changing, to say the least, especially with the brake booster. I kind of wish I went for the 276mm rotors so I could stick with 15 inch rims. Either way man, looking great. Keep us posted
Thats the whole reason why I'm sticking with 276mm. I just don't wanna buy new rims and tyres, I've already spent a *poo* tonne already so I rlly don't want to go any bigger. Plus weight reduction too with the 15"s lol.
Goodluck with the door handles, there's a certain trick to getting the lock barrel in and out which took me a little while to figure out so best of luck!
Those ducts without any proper funneling are doing next to bugger all. Air is lazy. It’s not going to flow down a tube when it can take the easier route and bleed out the sides.
Better off getting something like this:

Better off getting something like this:
Carbon Fiber Look Car Front Bumper Turbo Air Intake Pipe Air Funnel Kit AU | eBay
Find many great new & used options and get the best deals for Carbon Fiber Look Car Front Bumper Turbo Air Intake Pipe Air Funnel Kit AU at the best online prices at eBay!
www.ebay.com.au
Starke02
Active Member
Those ducts without any proper funneling are doing next to bugger all. Air is lazy. It’s not going to flow down a tube when it can take the easier route and bleed out the sides.
Better off getting something like this:
Carbon Fiber Look Car Front Bumper Turbo Air Intake Pipe Air Funnel Kit AU | eBay
Find many great new & used options and get the best deals for Carbon Fiber Look Car Front Bumper Turbo Air Intake Pipe Air Funnel Kit AU at the best online prices at eBay!www.ebay.com.au
Im not worried about it till nxt yr when I fit bigger front brakes
Steviejack01
New Member
Hey man! Loving the build! Is your current ECU the one from Hensperformance? Also are you still able to alter the tune fairly easily? Thanks mate!!
Starke02
Active Member
Evening lancer fanatics!
Been doing a little more tinkering the past 2 weeks, and got to fix some more rust, make the car run more efficient and reliable, and most importantly, FASTER! (only by a few milliseconds...)
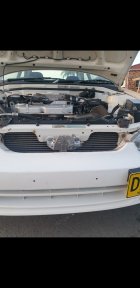
So first up, I got to rust proofing and painting the bonnet latch as the rust was getting pretty damn bad. Turned out pre nice imo.
While painting the latch, I tried painting the front plastic grille infront of the latch but it just turned out horrible. Paint just wouldn't stick, I think I just didn't wait long enough for the plastic primer to dry. Anyway, the small areas that did turn out good I used to see if it looked good after painting it on the car but it looked rlly odd. Scotia White grille is defiently a no no. I just took the grille of instead and I actually prefer it like that so I guess it was a blessing in surprise.
Next up I got around to installing a new fuel filter. Simple and relatively uneventful, a few swear words thrown about with the EXTREMELY tight nuts but that's pretty standard of jobs that are too easy to be quick. I have a strong feeling it was still the stock filter from new in 1998, and when I blew out of it some nice thick brown crap flew out so yeah.
Finally, I bought an ebay short shifter. Made sure I got one with good reviews ofc. Ordered it on Friday 5pm, already was posted and received a tracking number by 6pm, and arrived in 2.5 business days. Never had anything come that fast, and It was just standard free shipping.
Anyway the install was nice and easy, took abt an hr in the dark to do, and works perfectly. A slight bit far away when shifting into 1st, 3rd and 5th as there's no bend in the stick but its not a deal breaker. I might move the fulcrum point to its maximum height one day, but ill have to modify the bottom of the base so the shifter linkage can go move lower. Might do that this weekend if I have time after diy gasket matching the intake gasket to the ported intake ports. Gotta die the same to the exhaust side bur will do that when I go and install eveything so I can save money on a gasket.
Anyway that's my ranting done for the evening
Been doing a little more tinkering the past 2 weeks, and got to fix some more rust, make the car run more efficient and reliable, and most importantly, FASTER! (only by a few milliseconds...)
So first up, I got to rust proofing and painting the bonnet latch as the rust was getting pretty damn bad. Turned out pre nice imo.
While painting the latch, I tried painting the front plastic grille infront of the latch but it just turned out horrible. Paint just wouldn't stick, I think I just didn't wait long enough for the plastic primer to dry. Anyway, the small areas that did turn out good I used to see if it looked good after painting it on the car but it looked rlly odd. Scotia White grille is defiently a no no. I just took the grille of instead and I actually prefer it like that so I guess it was a blessing in surprise.
Next up I got around to installing a new fuel filter. Simple and relatively uneventful, a few swear words thrown about with the EXTREMELY tight nuts but that's pretty standard of jobs that are too easy to be quick. I have a strong feeling it was still the stock filter from new in 1998, and when I blew out of it some nice thick brown crap flew out so yeah.
Finally, I bought an ebay short shifter. Made sure I got one with good reviews ofc. Ordered it on Friday 5pm, already was posted and received a tracking number by 6pm, and arrived in 2.5 business days. Never had anything come that fast, and It was just standard free shipping.
Anyway the install was nice and easy, took abt an hr in the dark to do, and works perfectly. A slight bit far away when shifting into 1st, 3rd and 5th as there's no bend in the stick but its not a deal breaker. I might move the fulcrum point to its maximum height one day, but ill have to modify the bottom of the base so the shifter linkage can go move lower. Might do that this weekend if I have time after diy gasket matching the intake gasket to the ported intake ports. Gotta die the same to the exhaust side bur will do that when I go and install eveything so I can save money on a gasket.
Anyway that's my ranting done for the evening
Attachments

Cleanmin
Active Member
Hell yeah man, great to see some more progress, yeah the plastic primers can be a pain, but If you're rocking the no grille life then its allllll gravy, maybe a splash of scotia behind the grille space? Fuel filter will serve you well as the engine build comes along. The short shifter looks good, and yes it is a pain to cut it all out to run it on the shortest setting but oh well. Awesome
Starke02
Active Member
Been a busy bee lately and tinkered with the car a little more...
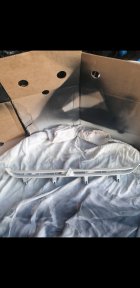
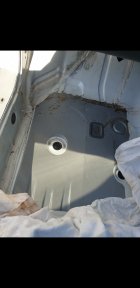
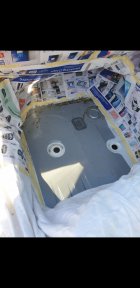
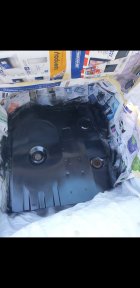
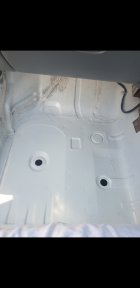
Started painting the interior of the car where the sound deadening used to be bc I want to make this car as pretty as a lancer can be. Some of it turned out absolute garbage as for some reason a certain brand of primer is just crap. Ruined my entire work and the paint just kept cracking and separating. I tried my best to remove all of my work with turpentine spirits and got most of eveyrhing off, apart from a few spots which luckily are hard to see as the seat blocks the view of it. Anyway I got a different brand of primer and then it worked its magic and turned out great. Im about to out on clear coat this weekend, which hopefully should protect it, so fingers crossed. I've got to do the drivers footwell, the floor of the back seats and the rear suspension towers to paint and then the car should look a whole lot cleaner.
With the floors, im going to add 'grip tape', just like what you find on a skateboard, to prevent both the driver and passenger's feet from slipping and sliding, especially when wet. I have a few photos to give an idea as to what this'll look like. Bought a roll from bunnings for 25 bucks, and is like 50 grit or something, so hopefully no mor slipping anymore! I'll also put some on the pedals bc my feet tend to slip a lot there.
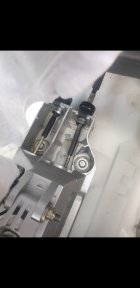
I also bought a short shifter kit and installed a few weeks ago, but it was on the middle setting. I tlly wanted it at its shortest setting but ofc the shifter base needs some work to it. I cut away an area under the right hand linkage so it doesn't touch the base and can move freely, and then I had to use 2 washers either side of the rear shifter base mounting points so the bottom ball joint doesn't touch the transmission tunnel.
Started painting the interior of the car where the sound deadening used to be bc I want to make this car as pretty as a lancer can be. Some of it turned out absolute garbage as for some reason a certain brand of primer is just crap. Ruined my entire work and the paint just kept cracking and separating. I tried my best to remove all of my work with turpentine spirits and got most of eveyrhing off, apart from a few spots which luckily are hard to see as the seat blocks the view of it. Anyway I got a different brand of primer and then it worked its magic and turned out great. Im about to out on clear coat this weekend, which hopefully should protect it, so fingers crossed. I've got to do the drivers footwell, the floor of the back seats and the rear suspension towers to paint and then the car should look a whole lot cleaner.
With the floors, im going to add 'grip tape', just like what you find on a skateboard, to prevent both the driver and passenger's feet from slipping and sliding, especially when wet. I have a few photos to give an idea as to what this'll look like. Bought a roll from bunnings for 25 bucks, and is like 50 grit or something, so hopefully no mor slipping anymore! I'll also put some on the pedals bc my feet tend to slip a lot there.
I also bought a short shifter kit and installed a few weeks ago, but it was on the middle setting. I tlly wanted it at its shortest setting but ofc the shifter base needs some work to it. I cut away an area under the right hand linkage so it doesn't touch the base and can move freely, and then I had to use 2 washers either side of the rear shifter base mounting points so the bottom ball joint doesn't touch the transmission tunnel.
Attachments
Cleanmin
Active Member
Great work with the paint in the boot man, came up brilliantly indeed. And yes the joys of short shifters in these cars haha. I haven't really seen anything like the grip tape setup before, interesting. I suppose if its grip you're after then you will be onto a winner with that!
Good work, quality of life stuff right there.
I played around with Grip tape in my cars and loved it so much now all my cars have some form of it around the pedals / floor. it makes a huge difference and you get some pretty funky styles / designs . Just make sure you get some branded grip tape over the cheap crap so it can hold up to a bit of moisture when you get into the car with wet feet, the cheap paper based stuff just fell apart over a very small amount of time but the plastic lined ones lasted me for years without needing to change it
I played around with Grip tape in my cars and loved it so much now all my cars have some form of it around the pedals / floor. it makes a huge difference and you get some pretty funky styles / designs . Just make sure you get some branded grip tape over the cheap crap so it can hold up to a bit of moisture when you get into the car with wet feet, the cheap paper based stuff just fell apart over a very small amount of time but the plastic lined ones lasted me for years without needing to change it
Starke02
Active Member
Oh thats great to hear another person has done it!Good work, quality of life stuff right there.
I played around with Grip tape in my cars and loved it so much now all my cars have some form of it around the pedals / floor. it makes a huge difference and you get some pretty funky styles / designs . Just make sure you get some branded grip tape over the cheap crap so it can hold up to a bit of moisture when you get into the car with wet feet, the cheap paper based stuff just fell apart over a very small amount of time but the plastic lined ones lasted me for years without needing to change it
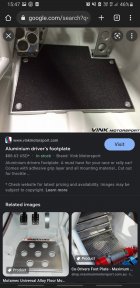
I was gonna go with an aluminium foot rest for the passenger side and an aluminium floor section for the pedal box but its too much weight so I thought of the grip tape crap. I got some seriously sticky stuff from bunnings intended for industrial use so hopefully it works out with that
Starke02
Active Member
Yeah should keep my feet planted on these serious rainy days we've been having in Sydney manGreat work with the paint in the boot man, came up brilliantly indeed. And yes the joys of short shifters in these cars haha. I haven't really seen anything like the grip tape setup before, interesting. I suppose if its grip you're after then you will be onto a winner with that!
Starke02
Active Member
Well its been a bit of a sh!t storm these last 2 months.
I took the long weekend we had and fitted everything, which was accompanied by many, many problems. So many parts just did not fit, or did not fit well, forcing me to go back and forth myutliple times to sort out the problems.
And who said cars were fun? Cause idk where the hell I got that from..
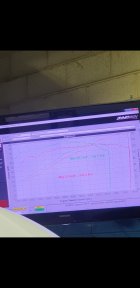
Anyway, despite the bazillion hiccups I had, I managed to get it all working, well mostly. The only problem I could not fix was the cam gear i waa sent. It was the wrong one and I have no idea why I was sent it but its on its way back to rpw to be replaced. This caused my cam timing to be severely retarded as I had to go back and use the stock gear and performance really lacked due to this. The dyno graph shows this as there's a huge drop in power compared to my previous dyno with just ihe and only made more power after 6500rpm. We reved it all the way to 8100rpm and discovered that the engine was still wanting to make more power but we only pushed it to 8100rpm as it was just a safe tune until I got a new cam gear. There's a slight dip in power after 7900 but then picks back up at 8100 so it shows it still wants to rev lol. I reckon with the timing advanced it would've made a nice 105kw and somewhere around 160-170nm.
After the dyno session, I found i had a major air leak which probably account for a few ponies lost the previous night so I had to take the whole manifold off again and discover where this air leak was coming from. - it was from the return and send coolant lines on the idle control. This was causing my idle to increase massively to aeound 1300rpm, and once I fixed it I waa able to drop it back to down 800rpm but bumped it to a nice 1000rpm so the idle lump doesn't cause it to stall.
Anyway the upside was that I was able to push the car since its been tuned enough to do so. Sadly, my bottom end thought otherwise and decided to spin a bearing. Most likely in cylinders 1 or 3 as there's where its most audible. I've done a compression test on all cylinders and its all within 5 psi of eacother so it can't be piston or valve related. That's a positive in that I just spent so much on the head, a negative in the aspect I only just bloody built the damn car a month prior.
It'll roughly cost me 7k for the entire bottom end build, which is definetly a tasty build so get some popcorn ready.
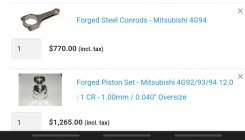
For the bottom end, I've decided to go with this:
-4g94 2.0L block
-Forged hi comp pistons oversized 1mm - this'll make it a 2.1L
-Forged rods
-Billet oil gears to supply enough oil at the high rpms I want
-Fully balanced rotating assembly
-Block tunnel bored and ever so slightly decked
-ACL race bearings
-ARP main bolts
For the head:
-My billet stage 3 rpw cam will be reground to stage 5 since I can now run a domed piston for extra room for me valves
Bolt on's:
-WRX 430cc injectors
-evo 4 5 6 upgraded radiator, 2.8x larger than my current rad and is dual core over my single core rad.
-4.6xx:1 final drive ratio. This is because when I raised my rev limit so much higher than the stock 6800rpm, my gears got so much longer and causing 1st gear to be over 60kph, 2nd gear to be maxing out over 120kph. Its just way too long for a engine with no torque so this should fix it and improve upshifts as it should be in the rev range eachtime now
-Lightweight flywheel
-Stronger clutch
Im hoping with all this i can get to somewhere around 170-180whp. I reckon with the cam timing advanced on my previous setup before it spun a bearing it would've made 140whp so an even larger cam and the extensive bottom end work and 300cc extra capacity should help it to reach this hopefully. If I were to do this work with the 4g93 bottom end and make it a 1.9L I reckon it'll rev more, probably close to about 10000rpm but I think I want the extra torque so I'm going with the 94 setup. This should probably get me between 9000-9500rpm and I have no doubts about that. The head flows superbly and the short intake runners really help high rpm power, and ofc the stage 5 cam. My current cams' duration is 266 256, the stage 5 is 284 284 and the valves open and close much much later so this will be an absolute huge improvement.
I've already ordered all my parts and is currently either on its way or being made. I waa told the pistons will take aeound 3 months to arrive sadly but I guess it gives me time to prepare eveyrhing. The last thins I have to do it buy the 94 block and send it away to get machined.
My engine is almost ready to be pulled out other than the driveshafts and transmission cables so ill finish that off nxt wk
Anyway life sucks and don't modify cars.


I took the long weekend we had and fitted everything, which was accompanied by many, many problems. So many parts just did not fit, or did not fit well, forcing me to go back and forth myutliple times to sort out the problems.
And who said cars were fun? Cause idk where the hell I got that from..
Anyway, despite the bazillion hiccups I had, I managed to get it all working, well mostly. The only problem I could not fix was the cam gear i waa sent. It was the wrong one and I have no idea why I was sent it but its on its way back to rpw to be replaced. This caused my cam timing to be severely retarded as I had to go back and use the stock gear and performance really lacked due to this. The dyno graph shows this as there's a huge drop in power compared to my previous dyno with just ihe and only made more power after 6500rpm. We reved it all the way to 8100rpm and discovered that the engine was still wanting to make more power but we only pushed it to 8100rpm as it was just a safe tune until I got a new cam gear. There's a slight dip in power after 7900 but then picks back up at 8100 so it shows it still wants to rev lol. I reckon with the timing advanced it would've made a nice 105kw and somewhere around 160-170nm.
After the dyno session, I found i had a major air leak which probably account for a few ponies lost the previous night so I had to take the whole manifold off again and discover where this air leak was coming from. - it was from the return and send coolant lines on the idle control. This was causing my idle to increase massively to aeound 1300rpm, and once I fixed it I waa able to drop it back to down 800rpm but bumped it to a nice 1000rpm so the idle lump doesn't cause it to stall.
Anyway the upside was that I was able to push the car since its been tuned enough to do so. Sadly, my bottom end thought otherwise and decided to spin a bearing. Most likely in cylinders 1 or 3 as there's where its most audible. I've done a compression test on all cylinders and its all within 5 psi of eacother so it can't be piston or valve related. That's a positive in that I just spent so much on the head, a negative in the aspect I only just bloody built the damn car a month prior.
It'll roughly cost me 7k for the entire bottom end build, which is definetly a tasty build so get some popcorn ready.
For the bottom end, I've decided to go with this:
-4g94 2.0L block
-Forged hi comp pistons oversized 1mm - this'll make it a 2.1L
-Forged rods
-Billet oil gears to supply enough oil at the high rpms I want
-Fully balanced rotating assembly
-Block tunnel bored and ever so slightly decked
-ACL race bearings
-ARP main bolts
For the head:
-My billet stage 3 rpw cam will be reground to stage 5 since I can now run a domed piston for extra room for me valves
Bolt on's:
-WRX 430cc injectors
-evo 4 5 6 upgraded radiator, 2.8x larger than my current rad and is dual core over my single core rad.
-4.6xx:1 final drive ratio. This is because when I raised my rev limit so much higher than the stock 6800rpm, my gears got so much longer and causing 1st gear to be over 60kph, 2nd gear to be maxing out over 120kph. Its just way too long for a engine with no torque so this should fix it and improve upshifts as it should be in the rev range eachtime now
-Lightweight flywheel
-Stronger clutch
Im hoping with all this i can get to somewhere around 170-180whp. I reckon with the cam timing advanced on my previous setup before it spun a bearing it would've made 140whp so an even larger cam and the extensive bottom end work and 300cc extra capacity should help it to reach this hopefully. If I were to do this work with the 4g93 bottom end and make it a 1.9L I reckon it'll rev more, probably close to about 10000rpm but I think I want the extra torque so I'm going with the 94 setup. This should probably get me between 9000-9500rpm and I have no doubts about that. The head flows superbly and the short intake runners really help high rpm power, and ofc the stage 5 cam. My current cams' duration is 266 256, the stage 5 is 284 284 and the valves open and close much much later so this will be an absolute huge improvement.
I've already ordered all my parts and is currently either on its way or being made. I waa told the pistons will take aeound 3 months to arrive sadly but I guess it gives me time to prepare eveyrhing. The last thins I have to do it buy the 94 block and send it away to get machined.
My engine is almost ready to be pulled out other than the driveshafts and transmission cables so ill finish that off nxt wk
Anyway life sucks and don't modify cars.
Attachments
Last edited:
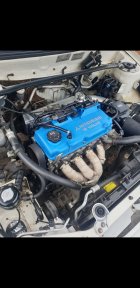
Starke02
Active Member
I've also done a few things before the engine went kaboom, such as painting the valve cover, removing power steering, and some other things. The power steering removal was absolutely one of the best mods I've done, it just eliminates all the problems and fears I had when goinf round a corner at serious speed. When I'd do that, the front end feeling thru the steering wheel would feel like it got super spongy and crap which was caused by the steering getting very light going round corners fast. This will definetly help so much at the track and daily driving isn't impacted at all in my opinion, so it's a win win I reckon